
Modifying Translations in Nama ERP
Translations can be modified using the Translation Change File.
The lines in the translation file allow modifying translations for:
- Fields
- Screens
- Page titles
- Groups
- System actions in Arabic, English, or both. (Either language can be left empty.)
Supported Languages:
- Arabic
- English
- French (treated as an alternative to English)
Translating Screen Names (Singular / Plural):
- The singular translation is used on the edit screen (e.g., Sales Invoice).
- The plural translation is used on the list screen (e.g., Sales Invoices).
To modify these translations:
- For singular: Select the type, leave the "ID" field empty, then fill in the "Arabic" and "English" fields.
- For plural: Select the same type, enter
sin the "ID" field, then fill in the "Arabic" and "English" fields.
Translating Fields:
General field translation:
- Enter the field ID in the "ID" field.
- Fill in the "Arabic" and "English" fields.
Translating a field within a specific screen:
- Specify the screen name in the "Type" field.
Translating a field across multiple screens:
- Create a "Type List" file containing those screens.
- Use this file in the "Type List" field.
Simplifying Translation Using a Keyboard Shortcut
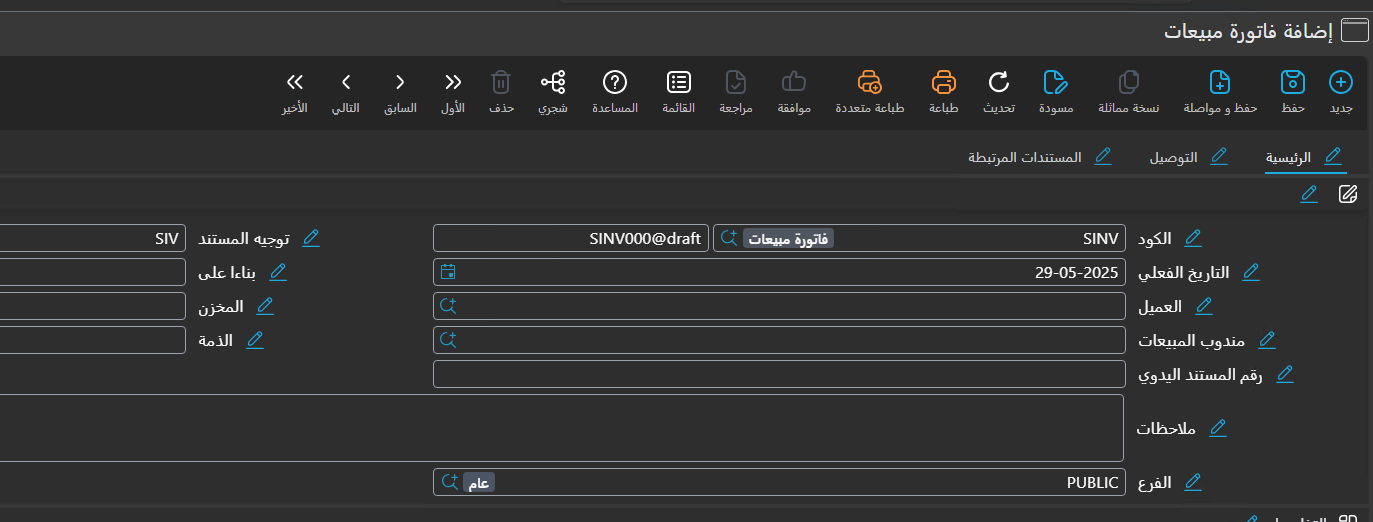
- Use the shortcut Alt + Ctrl + T to show buttons next to fields and headings for editing translations.
- Clicking the button displays a box containing two fields: Arabic and English.
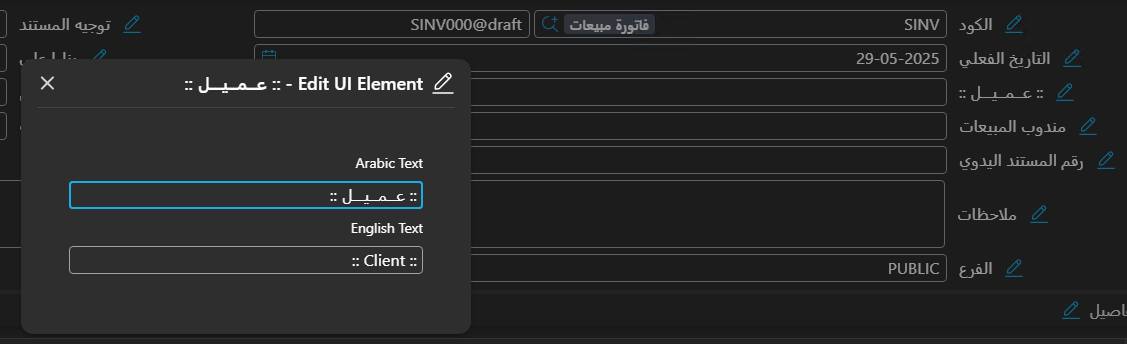
- The translation is modified temporarily and directly within the system.
- When finished, from the "More" menu choose Export Translations.
Export Translations Window
This window contains the following options: 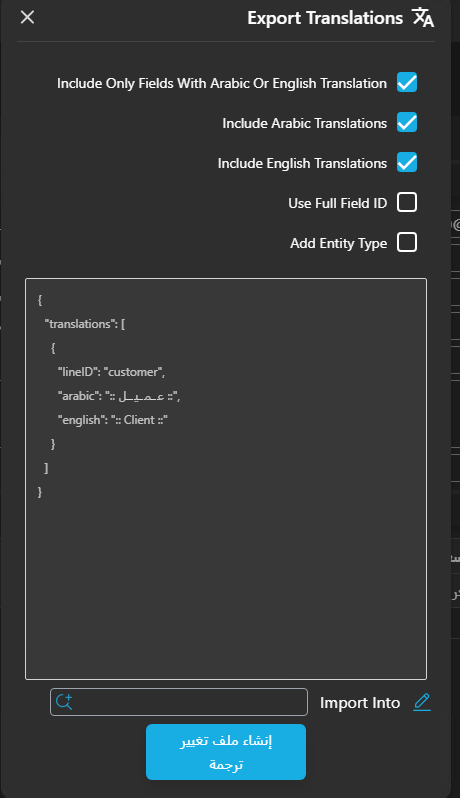
Include Only Fields With Arabic Or English Translation Include only fields whose translation has been modified.
Include Arabic Translations Add the Arabic translation.
Include English Translations Add the English translation.
Use Full Field ID Use the full field ID.
Add Entity Type Add the type to the translation file (to link the translation to the current screen only).
After selecting the options, click "Create Translation File", and a window will appear containing the selected translations. Fill in the remaining data and click "Save", and the translations will be loaded immediately.