
How the Menu Is Put Together
The menu down the side of the screen looks like a tree, so people expect to edit it like one — drag a folder here, drop an entry there. It is not stored that way at all.
A menu is a single record holding two flat tables: one listing the folders, one listing the entries. Neither table knows anything about shape. The tree you see is rebuilt every time the menu is drawn, by matching text codes between the two tables. Once that clicks, the screen stops looking strange and starts looking obvious.
Where to find it
Administration → Display Customization → Menu Definition.
One record, two grids
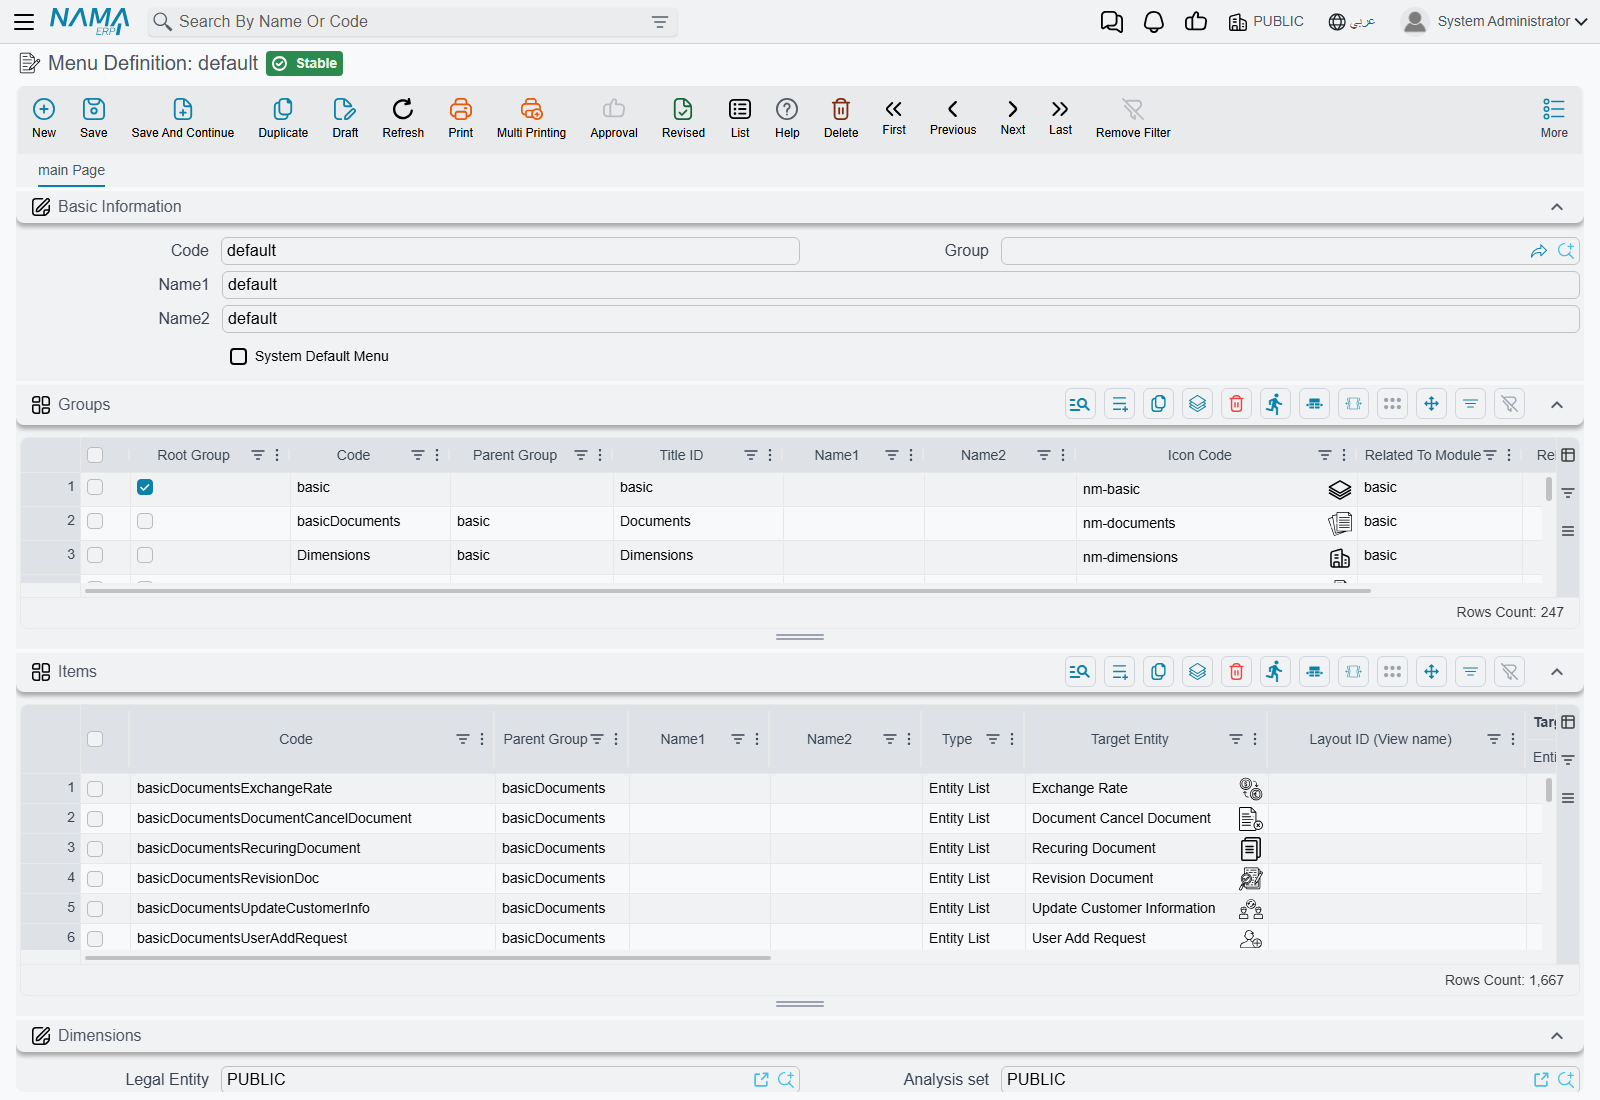
Open the menu that ships with the system — its code is default — and you get one tab with two grids under the usual code and name fields.
The Groups grid holds the folders. The Items grid holds the entries that open something. On a standard installation those two grids hold roughly 250 and 1,700 rows respectively, which is the first thing worth knowing: this is a big record, and you will be working inside it with the grid's own search rather than by scrolling.
Three levels, and only three
Every group is either a root group or a sub-group, and the tick box called Root Group is what decides which.
- A root group is a top-level folder — Sales, Accounting, Administration. It has no parent.
- A sub-group names its parent in Parent Group, and that parent must itself be a root group.
- An item names the sub-group it belongs to in Parent Group as well — both grids call the column the same thing — and that group must not be a root group.
So the shape is fixed at exactly three levels: root group → sub-group → entry. There is no fourth. Pointing a sub-group at another sub-group does not produce a deeper tree — the branch is simply never drawn, because the code that builds the tree only ever looks one level down.
A mistyped code does not raise an error — the row disappears
Before a menu is checked for mistakes, it is quietly tidied up. Part of that tidying deletes any group whose Parent Group matches no group, and any item whose Parent Group matches no group.
The result is that a typo in either of those columns does not produce the "group does not exist" message you might expect. You press Save, the save succeeds, and the row is simply gone. If a row you just added has vanished after saving, check its Parent Group first — it is almost always that.
What an entry can open
Every item has a Type, and that choice decides which of the neighbouring columns you are expected to fill in. The others are disabled, so the screen guides you.
| Type | What you fill in | What the user gets |
|---|---|---|
| Entity List | Target Entity | The list of those records — the everyday case |
| New Record | Target Entity | A blank new record, ready to type into |
| Record | Reference | One specific record, opened directly |
| Report | Reference | One report, at its parameters screen |
| Reports Group | Reference | A report group, shown as a browsable catalogue |
| All Reports | nothing | Expands into one entry per report group |
| Dashboard | Reference | One dashboard |
| Dashboards Group | Reference | Every dashboard in that group, as separate entries |
| Auto Dash Boards | nothing | Expands into the automatic dashboard groups |
| User Favourites | nothing | The signed-in user's own favourites, injected here |
| Link | Link | An external web address, opened in a new tab |
| Internal Link | Link | A screen inside Nama that is not a record list |
Reference is a two-part control: you pick the entity type first, then the record itself. The column beside it, Entity Type, is the first half of that pair rather than a setting of its own.
The three that take nothing — All Reports, Auto Dash Boards, User Favourites — are worth a second look. Each is a single row that expands into many entries when the menu is drawn, so the Favourites folder every user has is one row in this grid, not one row per user.
Entry or list — there is a system-wide default
Whether a master file's menu entry opens the list or a blank new record is set once for the whole system in Global Configuration, under appearance settings, with separate settings for master files and for documents. Those settings are applied while the menu is being built, so changing one has no effect until the menu is rebuilt.
The four columns that make an entry more than a link
Alongside the target, every item carries four optional settings that most people never notice, and they are where the interesting customisation lives.
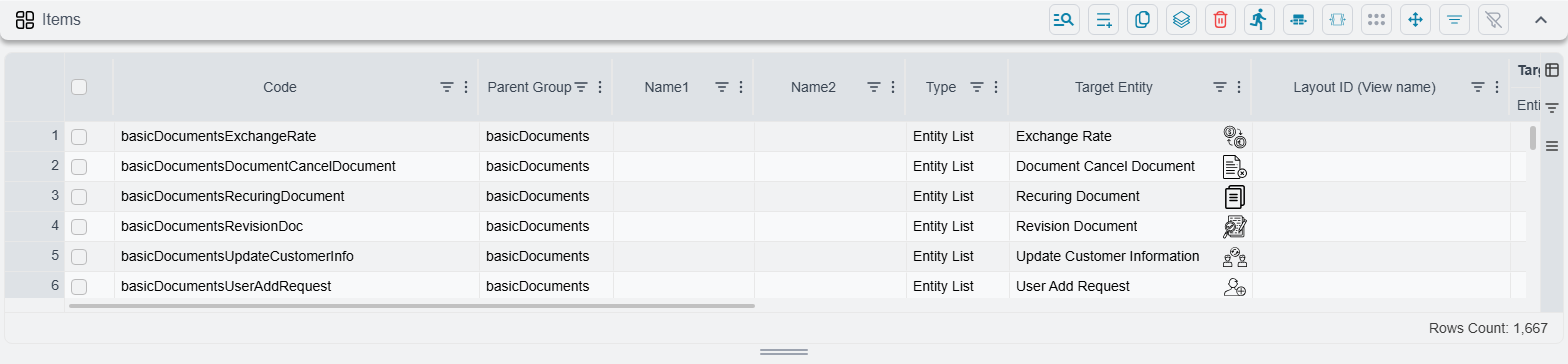
Layout ID — the column reads Layout ID (View name) — opens a named list view rather than the standard one. This is how a single entity appears several times in the menu with a different set of columns and a different filter each time, and the system does exactly this itself in a dozen places.
Criteria narrows what the list shows. Point an entry at Sales Invoices with a criteria of "this branch only", and that entry is a branch-specific invoice list.
Default Values Template fills in a new record the moment it opens. Combined with a type of New Record, this turns one entry into "New Sales Invoice, already set to the Cairo branch" — see default values templates.
Extra Field Filter restricts what the lookup fields on the opened screen will offer.
None of these are used by the menu that ships with the system. They exist for you.
Naming things
Both grids have Name1 (Arabic) and Name2 (English) columns, and both are usually left empty — including on nearly every row of the menu that ships.
That is deliberate, because the caption falls back in three steps:
- the Arabic or English name typed on the row, if there is one;
- otherwise a Title ID — the name of a wording the system already translates, so the caption follows the reader's language without your typing it twice. The practical way to find one is to copy it from a shipped row that already says what you want;
- otherwise, for entries only, a caption worked out from the target: the plural name of the entity for a list, the singular for a new record, the code and name for a specific record.
Step 3 is why an entry pointing at Sales Invoices needs no title at all: it is already called "Sales Invoices" in whichever language the user is working in, and it follows any change to that translation.
Type a name and you lose that. The row will read the same in both languages forever after, which is occasionally what you want and usually not.
Groups have no third step
A folder with no name and no Title ID has no caption at all. Give every group you create either a name in both languages or a Title ID.
Order is row order
There is no "sort order" column on either grid, and none is needed. The order of the rows in the grid is the order of the menu. Root groups appear in the order they sit in the Groups grid, sub-groups in the order they sit in that same grid, and entries in the order they sit in the Items grid. Nothing is re-sorted when the menu is drawn.
Moving an entry up the menu therefore means moving its row up the grid.

Icons
Both grids have an Icon Code column, and both may be left empty. Folders fall back to a folder icon and entries to a general one, so a menu with no icons set anywhere still looks deliberate.
Two conveniences on this screen
Inserting a row copies the row above. Add a row to the Items grid and it arrives already carrying the previous row's parent group, type and target entity. Adding ten entries to one folder is one row of typing and nine small edits.
The Parent Group column suggests what fits. On an item it offers the sub-groups in the record; on a group it offers the root groups. Both lists are built from what is in the grids right now, so a group you added a moment ago is already offered.
Finding an entry without hunting for it
A full menu holds well over a thousand entries, so nobody navigates it by opening folders. Ctrl + U opens the menu with the cursor in its search box, and typing a few letters filters it.
The search is more forgiving than it looks. It matches the Arabic title, the English title and the name of the underlying screen at once, so an Arabic user can type an English word and still find the entry — and it copes with typing Arabic on an English keyboard layout, which is how most people type in a hurry.
The list stops at 25
Search results are capped at twenty-five entries. On a broad word — "invoice", "report" — you are seeing the first twenty-five matches, not all of them. Type another word or two to narrow it rather than assuming the rest do not exist.
Not to be confused with Ctrl + K, which searches for records rather than menu entries.
The menu itself can also be displayed three ways — as a tree, as a drill-down, or as a focused tree — and the choice is per person and per browser, remembered between visits. Someone whose menu looks unfamiliar in a screen-share has usually just picked a different mode.
What you cannot do here
There is no visibility tick box. Neither a group nor an entry has an "inactive" flag, and neither does the menu record itself. To take something out of the menu you either delete its row or block it for a role — see who sees which menu.
There is also no target type that runs an action. A menu entry opens something; it never performs something.
Before you change anything
Everything above describes how a menu is built. It does not describe how to customise the menu your users see — editing the shipped menu directly is not the way, and the reason is worth reading before you start typing.
Changing the menu explains it.
Messages you may see
Refusals raised when you save a menu definition.
| Message | Why | What to do |
|---|---|---|
| There is anothe menu definition marked as system default: {0} — «يوجد تعريف قائمة آخر معلم عليه كقائمة إفتراضية للنظام: {0}» | System Default was ticked here while another menu already carries it. Only one menu can be the system default. The message is meant to name the other menu but arrives with its placeholder unfilled, so it does not tell you which one. | Untick it here, or find the menu that already has it — filter the menu list on System Default — and clear it there first. |
| Can not assign parent to root groups — «لا يمكن تحديد مجموعة أعلي للمجموعات الرئيسية» | A row in the Groups grid has Root Group ticked and a Parent Group filled in. A root group is a top-level folder and cannot sit inside anything. | Clear Parent Group, or untick Root Group if the row was meant to be a sub-group. |
| Use root groups only as parent group, the group {0} used in the group {1} is not root — «لا يمكنك سوى استعمال المجموعات الرئيسية كمجموعة أعلى - المجموعة {0} المستعملة في المجموعة {1} ليست رئيسية» | A sub-group's Parent Group names another sub-group. The menu is exactly three levels deep, so a sub-group's parent must be a root group. | Point the parent at a root group, or tick Root Group on the parent if it really is a top-level folder. |
| {0} must be of the type {1} — «{0} يجب ان يكون من النوع {1}» | An item whose Type is Report has a Reference that is not a report definition. | Re-pick the reference, choosing a report definition. |
| {0} must be of the type {1} or type {2} — «{0} يجب ان يكون من النوع {1} او النوع {2}» | An item whose Type is Reports Group or Dashboards Group has a Reference that is neither a master group nor a report/dashboard group record. | Pick a group of the right kind. If you use a master group, its For Type must be the report or the dashboard type — otherwise the sibling message {0} must be a group for the type {1} follows. |
See also
- Changing the menu — the safe way to customise, and why
- Who sees which menu — assignment, hiding and why a change has not appeared yet
- Security profiles — trimming the menu per role without building a menu at all