
Integration with ZATCA (Saudi Arabia – Fatoora)
Overview
The Zakat, Tax and Customs Authority (ZATCA) requires VAT-registered businesses in Saudi Arabia to issue their invoices electronically and integrate with the Fatoora e-invoicing platform. NamaERP supports Phase 2 (the Integration Phase), where the system generates each invoice as UBL 2.1 XML, signs it digitally, and submits it directly to the Authority.
Before diving into the setup steps, it helps to understand a few concepts you'll meet repeatedly during integration:
Two kinds of invoices
Fatoora distinguishes between two invoice types, each with its own path:
| Type | Used for | Submission model | When is the invoice valid? |
|---|---|---|---|
| Standard / Tax Invoice (B2B) | Business-to-business sales | Clearance | Only after ZATCA approves it and returns it stamped with an official QR code — it must not be shared with the buyer before that |
| Simplified Invoice (B2C) | Sales to end consumers | Reporting | Handed to the customer immediately at point of sale; reported to ZATCA within 24 hours |
TIP
In the Tax Payer Configuration you'll find two flags: Standard Invoices and Simplified Invoices. Enable whichever matches your business — you can enable both if you sell to both businesses and individuals.
The onboarding lifecycle (CSID)
No system may send invoices until it has "onboarded" itself with the Authority. Onboarding has three stages, all performed automatically by the Approve System button:
- Generate the CSR: the system builds a Certificate Signing Request from your business's tax data.
- Compliance CSID: the system submits the request together with an OTP obtained from the Fatoora portal, then sends sample invoices to prove compliance.
- Production CSID: once the compliance samples pass, the system obtains the final production certificate and stores it inside the configuration, making your business ready to submit live invoices.
Prerequisites
Before you start, make sure you have:
- Access to the Fatoora Portal to generate the OTP.
- The business's VAT Registration Number (15 digits, starting and ending with 3).
- The Commercial Registration Number (CRN).
- The complete National Address of the business.
- The EGS Serial Number (Electronic Generation Solution unit serial).
- The ZATCA SDK installed and the
zatca.warsigner deployed on the server (covered in the next section).
Preparing the Client Server
The Authority's digital-signing toolkit (ZATCA SDK) is used to sign invoices and compute the hash and QR code. Follow these steps to prepare the server:
- Download the ZATCA SDK from Zatca SDK
- Extract the downloaded archive
- Inside the extracted folder you will find a file named
install.ba_— rename it toinstall.batand run it- You can easily rename it by selecting the file and pressing F2
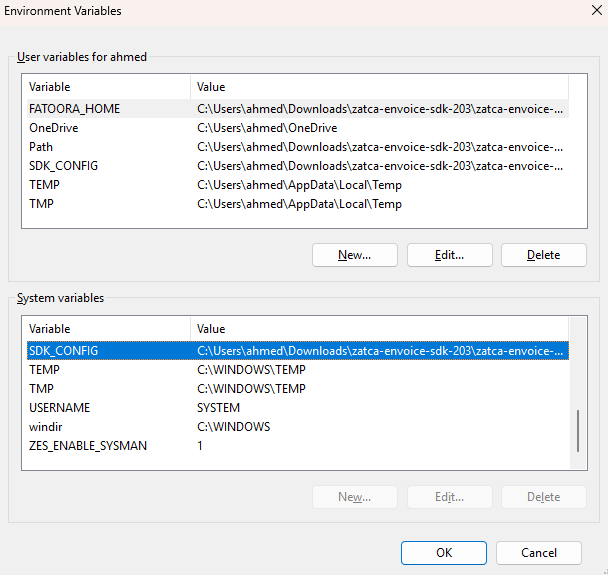
- Go to Environment Variables via Computer Properties > Advanced, or run the following command in the Run Dialog (Win + R)
rundll32 sysdm.cpl,EditEnvironmentVariables- Copy the
SDK_CONFIGentry from theUser Variablessection to theSystem Variablessection
Copy the variable automatically
You can run the following code in Windows PowerShell (must be run as Administrator) to copy the variable above instead of copying it manually:
$varName = "SDK_CONFIG"
$userValue = [Environment]::GetEnvironmentVariable($varName, "User")
if ($userValue) {
    Write-Host "Copying $varName with value '$userValue' to system environment..."
    [Environment]::SetEnvironmentVariable($varName, $userValue, "Machine")
    Write-Host "Copied successfully."
} else {
    Write-Host "User environment variable '$varName' not found."
}
Remember to run PowerShell as Administrator.
After copying — whether manually or using the PowerShell script — the result should look similar to the following:
- Open the file
Configuration/config.jsonand verify that the paths inside it are correct. - Download the
zatca.warfile from: https://namasoft.com/bin/zatca.war- Place the file in the
Tomcat Path/webappsfolder.
- Place the file in the
WARNING
zatca.war is the signing service the system calls on every submission. If you see the message "Please update zatca JAR", the service is either not deployed or out of date.
Preparing the System
- From "Global Configuration" → Page 2, select
ZATCA (Saudi Arabia)in the field "e-Invoice Page To Show":
- After changing the field value, perform a Regen UI so the ZATCA page appears inside invoices and documents.
Completing the Company Information
Fatoora relies on complete seller (establishment) data. Fill in the following fields in the company file (the legal entity / branch used in the configuration):
- Commercial Registration Number
- Tax Registration Number
Then complete the establishment's National Address:
- Country Code
- Country
- City
- Governorate
- District
- Street
- Building Number
- Postal Code
- Neighborhood
- Address 1
- Land Identifier
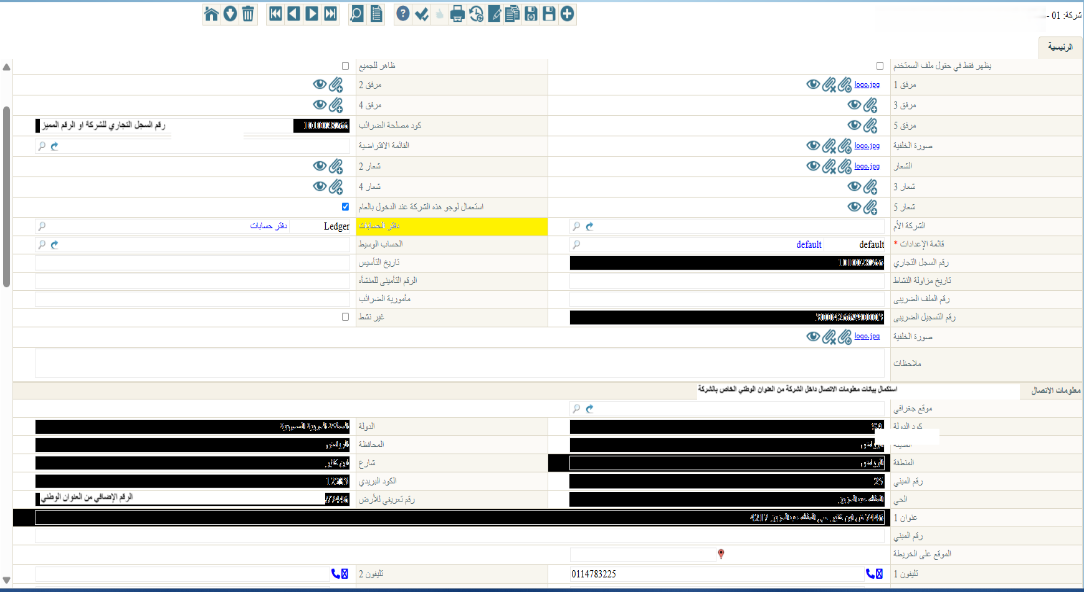
WARNING
The National Address is mandatory. If an address field (country, city, street, building number…) is missing, the configuration will fail validation and you'll see a message naming the missing field in the selected branch.
Creating a Tax Payer Configuration
Everything above comes together in the Tax Payer Configuration record. Create a new record and, on the main page, set the basic data:
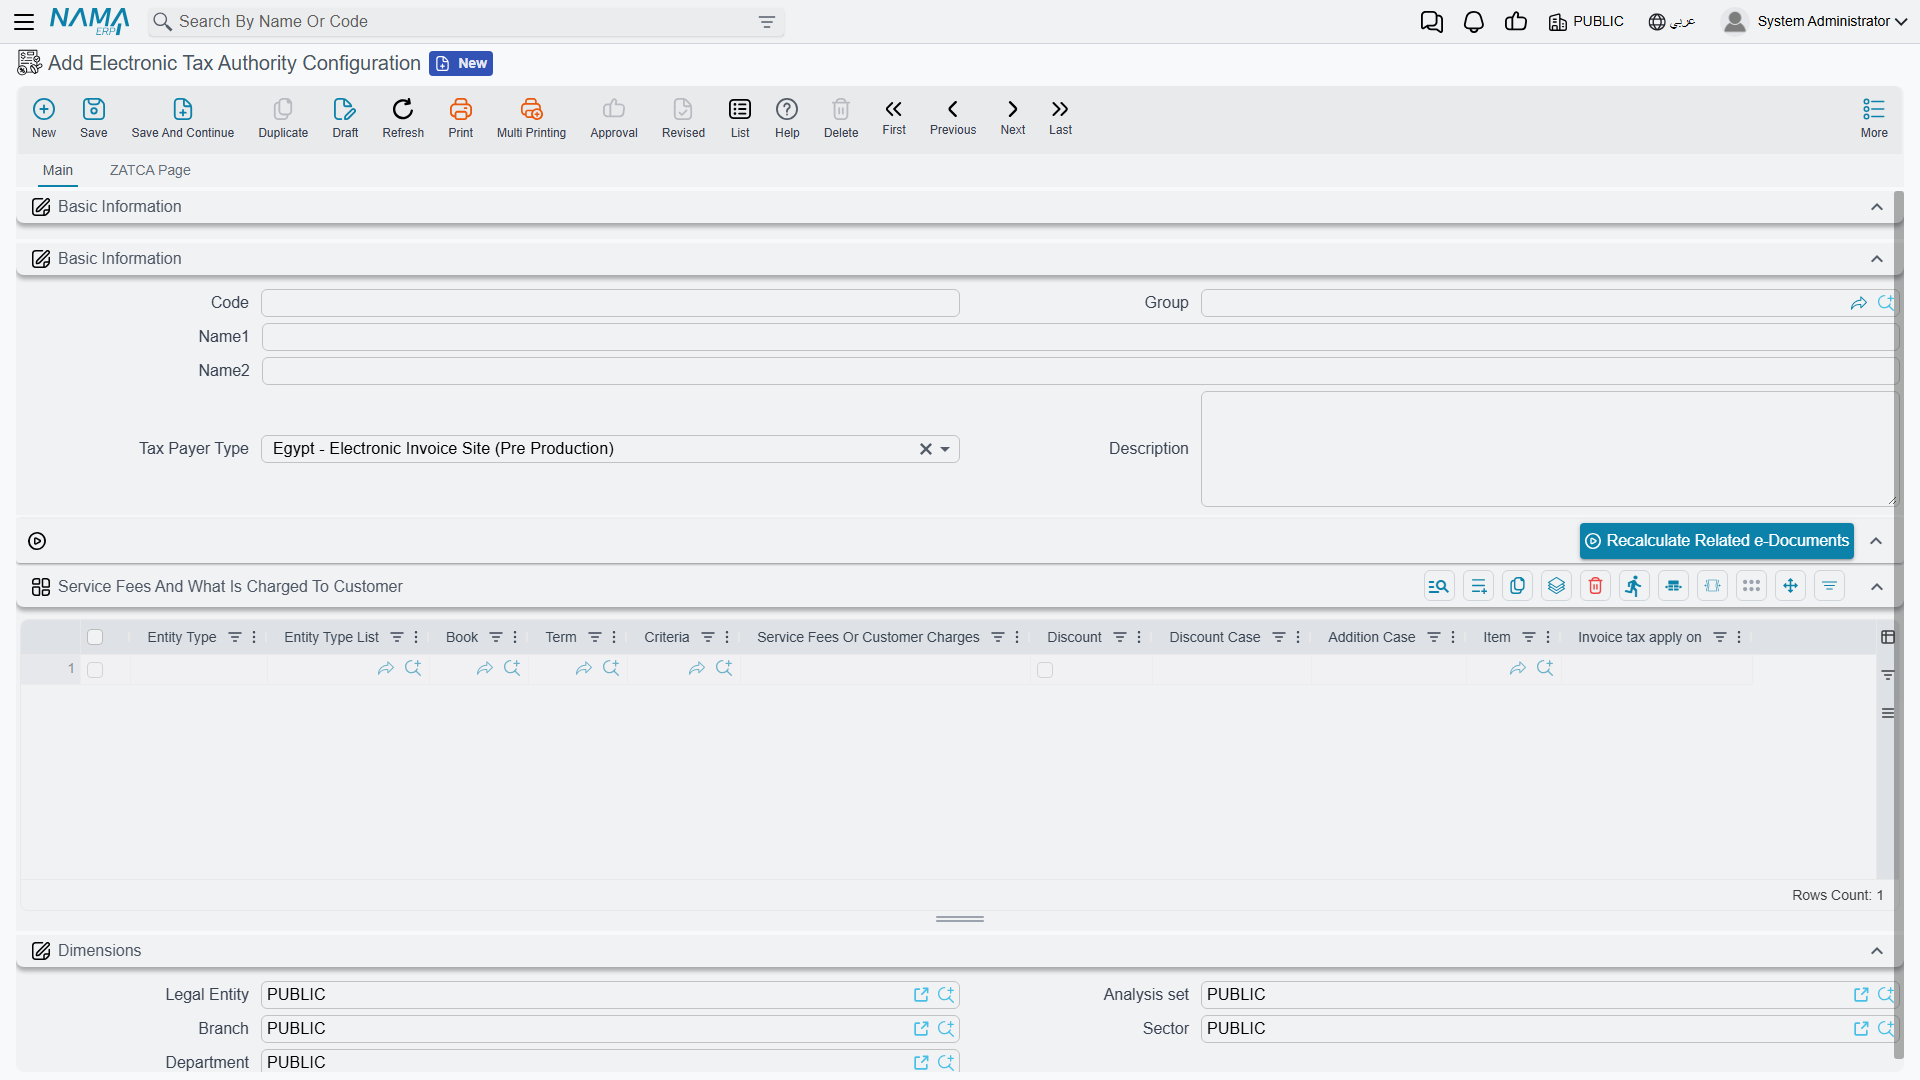
When configuring, select the appropriate value in the Tax Payer Type field according to your integration stage:
| Value | Use |
|---|---|
Saudi Arabia - E-Invoice Developer Portal | Developer (Sandbox) environment for testing and development |
Saudi Arabia - E-Invoice Simulation Portal | Simulation environment for integration during the trial period |
Saudi Arabia - E-Invoice Portal | Live (Production) integration |
TIP
The API URL field is filled automatically when you pick the tax payer type. Always start with the Simulation environment and test your scenarios end-to-end before moving to production.
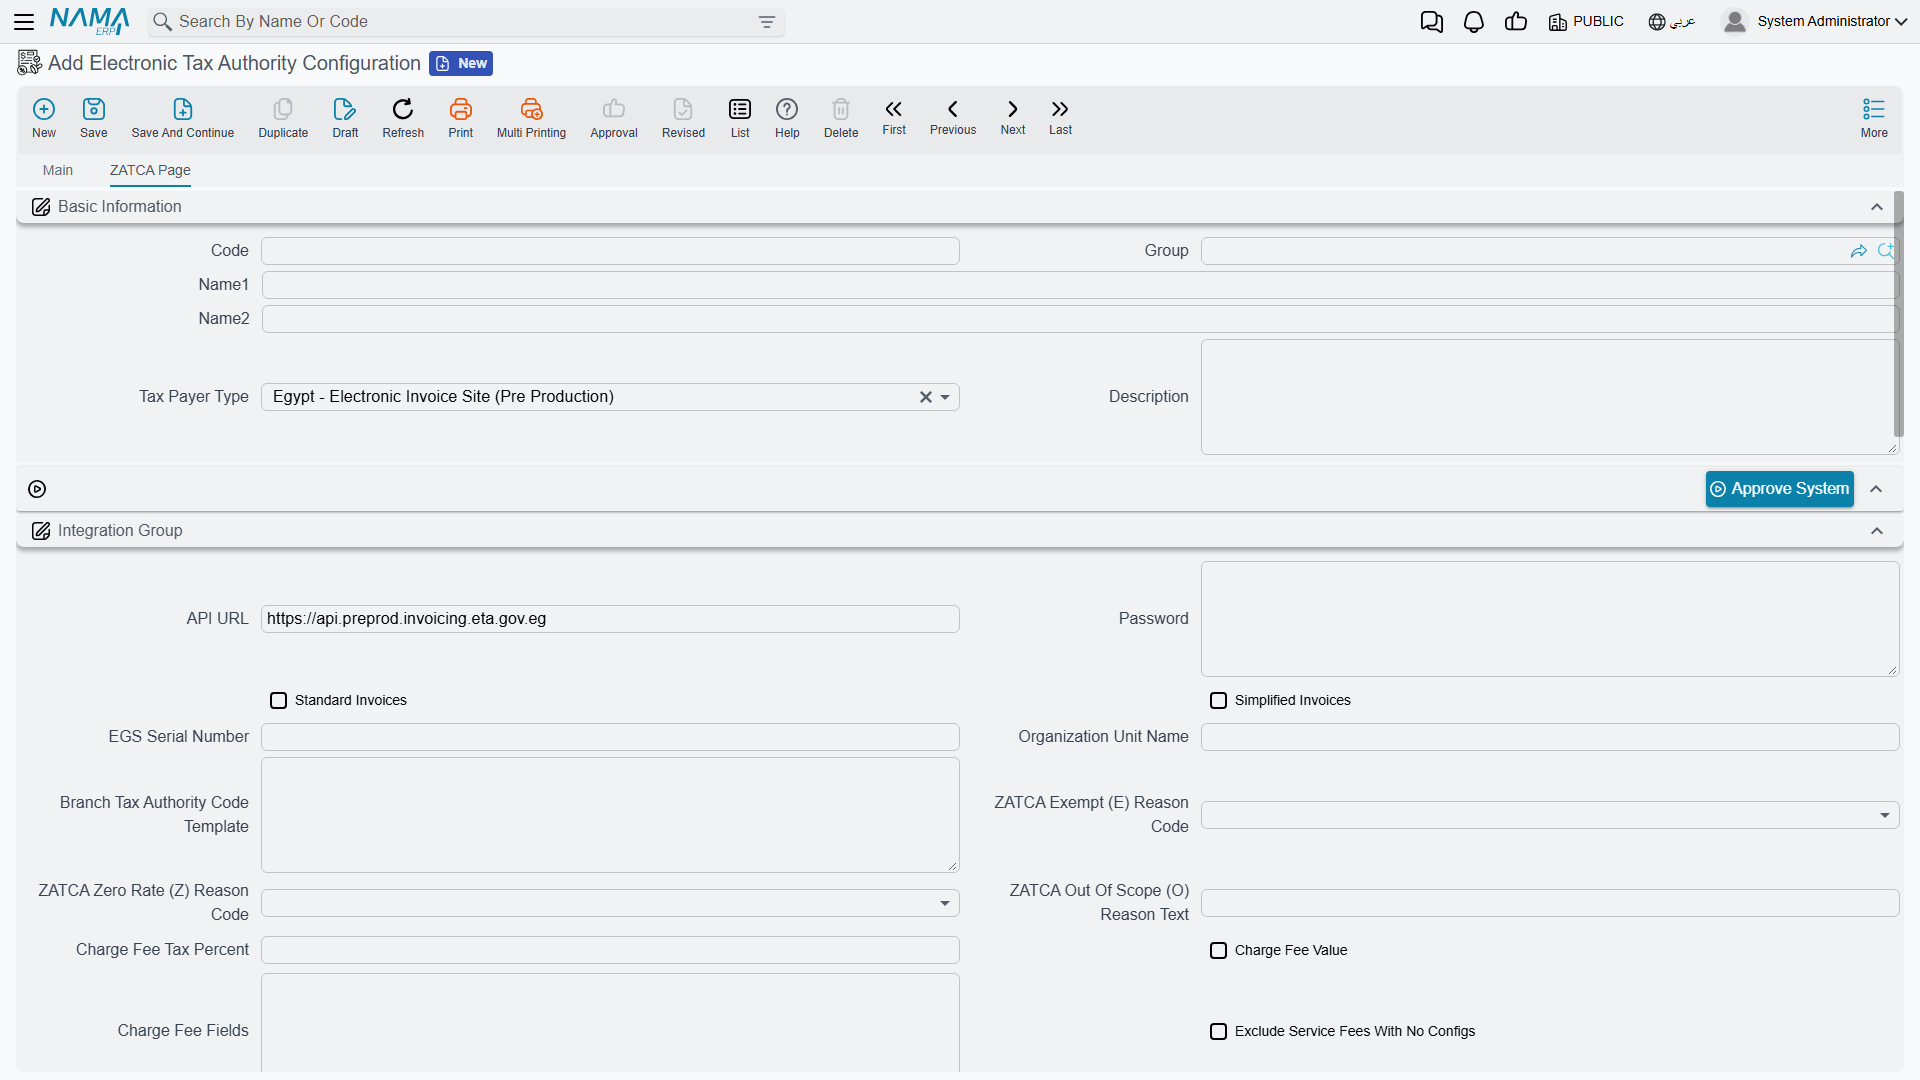
Next, switch to the ZATCA Page tab to complete the integration data:
| Field | Description |
|---|---|
| Tax Reg No | The establishment's VAT number (15 digits, starts and ends with 3) |
| EGS Serial Number | The Electronic Generation Solution unit serial — required for ZATCA integration |
| Standard Invoices | Enable if you issue tax invoices to businesses (B2B) |
| Simplified Invoices | Enable if you issue simplified invoices to individuals (B2C) |
| Organization Unit Name | Required for establishments belonging to a tax group: enter the 10-digit record number when the 11th digit of the VAT number = 1 |
| Password | Used to enter the OTP at the time of system approval (see next section) |
| Branch Dimension | The branch / legal entity from which the seller data and National Address are taken |
| Activity Type | The business activity code of the establishment |
Tax Group
If your establishment is part of a tax group (the 11th digit of the VAT number equals 1), Organization Unit Name must contain a valid 10-digit record number, otherwise the system will refuse to generate the certificate request.
Approving the System (Onboarding)
After saving the configuration and filling in its data, onboard the system with the Authority:
- Log in to the Fatoora Portal and generate an OTP.
- Place the OTP in the Password field on the ZATCA page.
- Click the Approve System button.
When clicked, the system performs the three stages described in the overview (generate CSR → compliance CSID + sample validation → production CSID) and stores the final certificate inside the configuration. On success, the establishment is ready to submit invoices.
TIP
The compliance samples the system sends depend on which invoice types you enabled: enabling Standard Invoices validates standard invoice / credit note / debit note samples, and likewise for simplified. So enable only the types you will actually issue.
WARNING
The OTP is valid for a limited time. If it expires before you click Approve System, generate a new one from the Fatoora portal.
Configuring Tax Codes and VAT Categories
ZATCA classifies every invoice line by its VAT category. Each tax used in your invoices must be mapped to a valid category:
| Code | Category | Description |
|---|---|---|
S | Standard rate | Taxable at the standard rate (15%) |
Z | Zero rate | Zero-rated supply |
E | Exempt | Exempt from VAT |
O | Out of scope | Not subject to VAT |
When the category is not S, the Authority requires an exemption / exception reason. So set the following on the ZATCA page in the configuration:
- ZATCA Exempt (E) Reason Code — for exempt-item invoices.
- ZATCA Zero Rate (Z) Reason Code — for zero-rated items.
- ZATCA Out Of Scope (O) Reason Text — a free-text description for out-of-scope items.
The Authority uses a standardized list of exemption codes known as VATEX. Pick the code that matches your activity:
| Code | Reason |
|---|---|
VATEX-SA-29 | Financial services |
VATEX-SA-29-7 | Life insurance services |
VATEX-SA-30 | Real estate transactions |
VATEX-SA-32 | Export of goods |
VATEX-SA-33 | Export of services |
VATEX-SA-34-1 | International transport of goods |
VATEX-SA-34-2 | International transport of passengers |
VATEX-SA-34-3 | Services connected to international passenger transport |
VATEX-SA-34-4 | Supply of a qualifying means of transport |
VATEX-SA-34-5 | Services related to goods or passenger transportation |
VATEX-SA-35 | Medicines and medical equipment |
VATEX-SA-36 | Qualifying metals |
VATEX-SA-EDU | Private education to citizen |
VATEX-SA-HEA | Private healthcare to citizen |
VATEX-SA-MLTRY | Supply of qualified military goods |
VATEX-SA-OOS | Out of scope of VAT |
WARNING
When using category S, the tax rate must be exactly 15%. For categories E, Z and O, the invoice will not be accepted without a valid reason code/text.
Where the exemption code comes from (Tax Plan)
You aren't limited to defining the exemption codes above on the configuration — you can also set them on the Tax Plan and its lines. The Tax Codes Type field on the configuration decides which level the codes are read from — the same mechanism used for your other tax codes — and when the chosen level leaves a code empty, the system falls back to the code defined on the configuration.
Customer (Buyer) Setup
For standard (B2B) invoices, the Authority needs to identify the buyer. Complete the tax data for every customer you will issue standard invoices to:
| Field | Description |
|---|---|
| Tax Reg No | The buyer's VAT number — required for a VAT-registered buyer (B2B) |
| ZATCA Buyer Id Type | The type of identity used to identify the buyer (see the table below) — optional; if left empty it is auto-derived from whichever identity field is filled |
| Id Number | The identity value matching the selected type |
| Address | Country, city, district, street, building number and postal code |
Available buyer identity types:
| Code | Identity | Source field (value) | When to use |
|---|---|---|---|
TIN | Tax Identification Number | Tax Reg No | A VAT-registered buyer |
CRN | Commercial Registration | Commercial Reg No | Businesses and entities |
MOM | MOMRAH License | Distinguished Number | As per license |
MLS | MHRSD License | Distinguished Number | As per license |
700 | 700 Number (Unified National Number) | CR National Number | As per registration |
SAG | MISA License | Distinguished Number | Investment entities |
NAT | National ID | Id Number | Citizen individuals |
GCC | GCC ID | Distinguished Number | GCC nationals |
IQA | Iqama Number | Distinguished Number | Residents |
PAS | Passport ID | Id Number | Non-residents |
OTH | Other ID | Distinguished Number | Other cases |
Choosing the identity type by customer kind
- Company / entity (private or government) → usually
CRNorTIN. - Individual citizen →
NAT(never useCRNfor individuals). - Resident →
IQA, visitor / foreigner →PAS.
Leave the type empty to auto-derive it
If you don't set ZATCA Buyer Id Type, the system infers the code from the filled field: an ID number on an individual → NAT, on a foreigner → PAS; a commercial registration or distinguished number → CRN; a CR national number (the unified national number) → 700; and the VAT registration number → TIN. You only need to set the type explicitly to force a specific scheme (such as MOM, MLS, SAG, GCC or IQA), in which case the distinguished number is used as the identity value.
Commercial registrations that begin with 700
If the Commercial Reg No value itself starts with 700, it is a Unified National Number and is automatically sent under scheme 700 instead of CRN — whether the buyer Id type is auto-derived or explicitly set to CRN.
WARNING
On a standard invoice the buyer must carry either a VAT number or one of the identity types above; otherwise the invoice is rejected. The identity value must also be alphanumeric only — no dashes or spaces.
Sending Invoices
Invoices are collected and submitted to the Authority through the Tax Authority Submission Document.
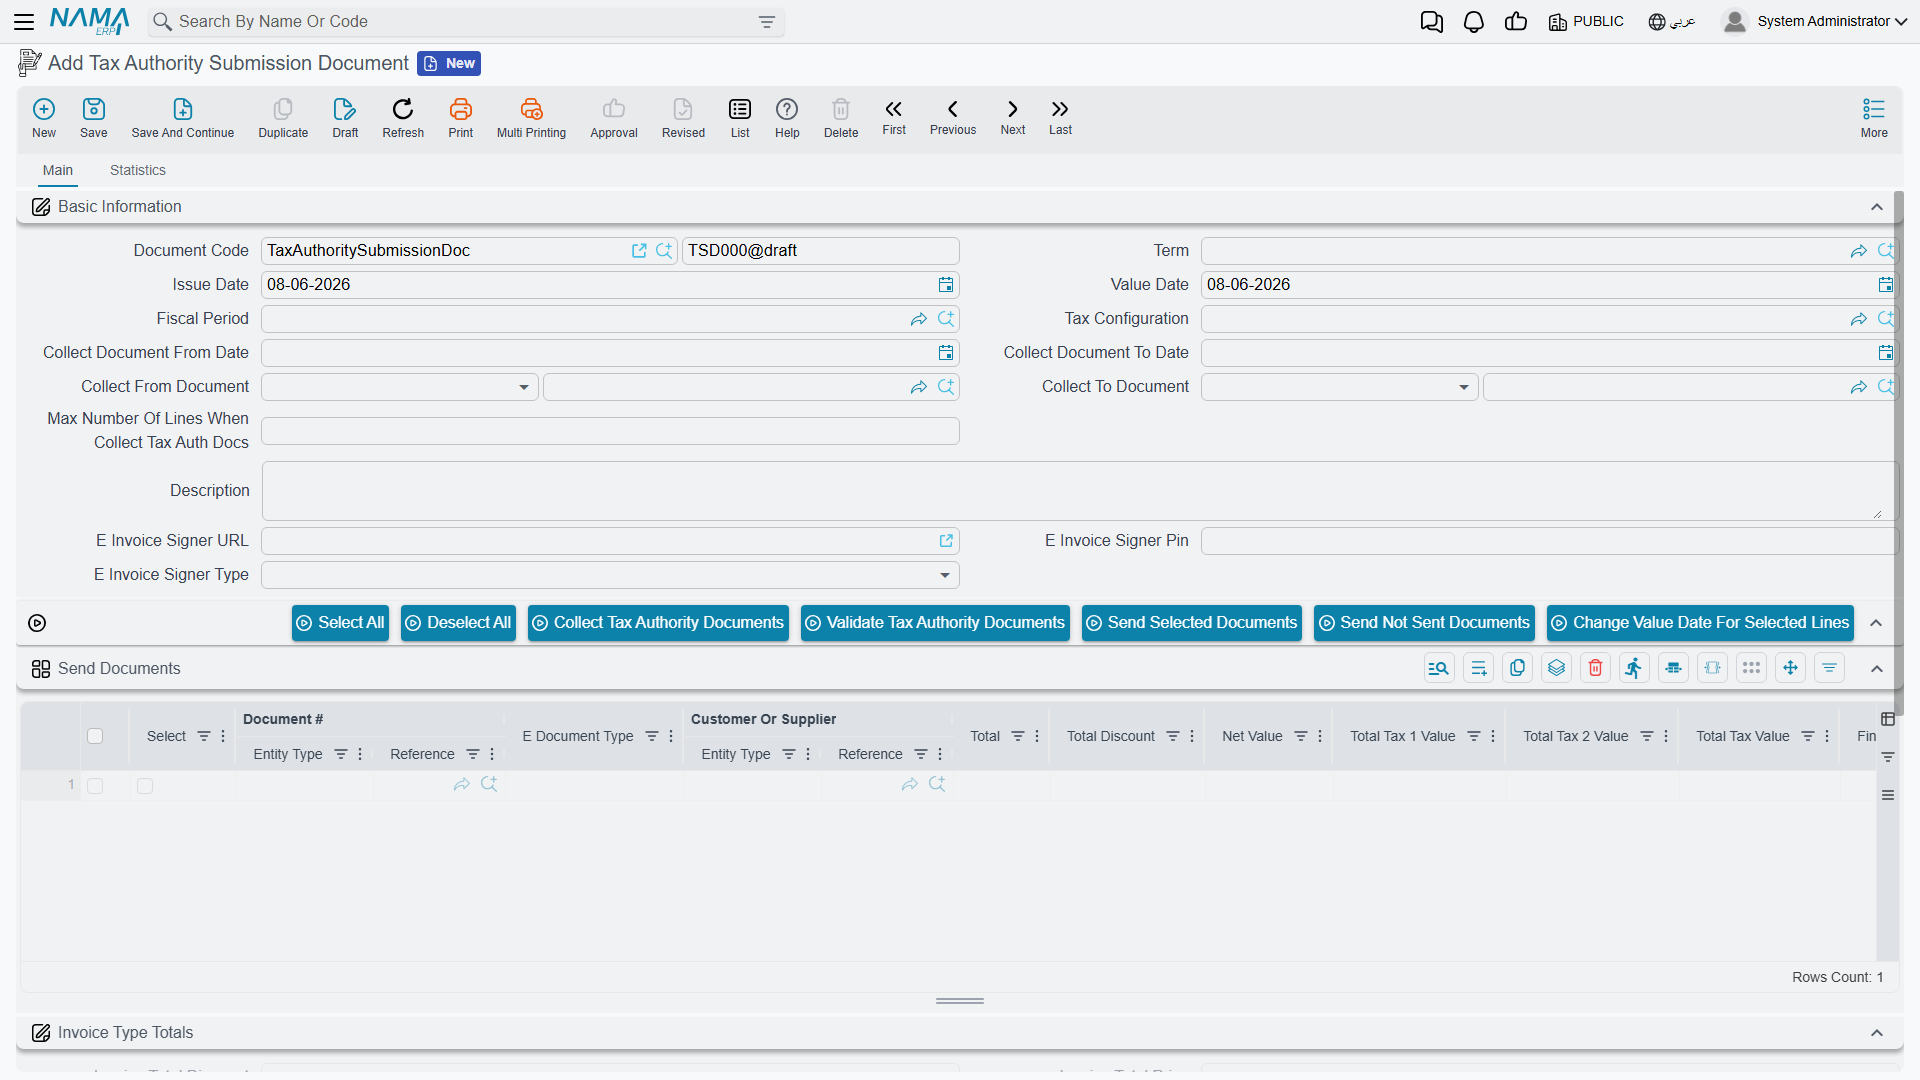
Steps:
- Create a new submission document and select the relevant Tax Payer Configuration, then set the collection range (from/to date or from/to document).
- Click Collect Tax Authority Documents to add the invoices due for submission to the lines.
- (Optional) Click Validate Tax Authority Documents to check the data before sending, or Preview Documents Before Sent to inspect the generated XML.
- Click Send Selected Documents or Send Not Sent Documents to submit the invoices.
The system routes each invoice automatically by its type: standard invoices go through the Clearance path and simplified invoices go through the Reporting path.
Submission statuses
After sending, each document's status is set to one of:
| Status | Meaning |
|---|---|
| Not Sent | Not yet submitted to the Authority |
| Sent | Accepted by the Authority (cleared or reported successfully) |
| Not Valid Sent | Rejected by the Authority — check the error field on the line for the reason |
Tracking invoice status
- Use the Check Tax Authority Status For Sent Document button to query the final status from the Authority and update it on the lines.
- From the invoice itself, use View Invoice At E Invoice Site to open the invoice on the Authority's portal.
TIP
For standard invoices, the legally valid version is the Cleared Invoice returned by the Authority, which carries the official QR code; the system keeps it after clearance. Simplified invoices carry a QR code from the moment they are issued.
Exporting the invoice XML
The submission document offers two actions to pull the raw UBL XML for the selected lines — useful for audits or for proving what was actually submitted:
- Export Cleared / Sent XML For Selected Lines — exports the exact XML the Authority received: the cleared (ZATCA-stamped, QR-bearing) version for standard invoices, or the reported version for simplified ones.
- Export Current XML For Selected Lines — regenerates the XML from the document's current data on the spot.
Exporting both and comparing them tells you whether the underlying invoice changed after submission: if the current XML no longer matches the cleared/sent one, the source document was edited after it was submitted. Lines belonging to authorities that don't use XML are skipped.
Supported Document Types
| Type | Supported |
|---|---|
| Invoice | Yes |
| Credit Note | Yes |
| Debit Note | Yes |
Maximum Days to Send
The default number of days allowed to send an invoice after its value date is 3 days, and likewise to cancel it. You can change this via the Max Days To Send Invoice and Max Days To Cancel Invoice fields in the configuration.
Common Rejection Causes
| Problem | Solution |
|---|---|
| Seller/buyer identity rejected | Make sure the identity type is correct, its value is alphanumeric only, and the National Address is complete |
| Invalid VAT number | Must be 15 digits starting and ending with 3 |
| Standard invoice with no buyer identification | Add the buyer's VAT number or one of the identity types |
| Exempt/zero-rated line without a reason | Set the exemption reason code (E/Z) or out-of-scope text (O) in the configuration |
| "Please update zatca JAR" | Make sure zatca.war is deployed in webapps and running |
| "Please approve system first" | Click Approve System after entering the OTP |