
Getting Started at the Register
This page walks through the everyday basics: starting the application, signing in, finding your way around the menu, locking the screen when you step away, and switching language or theme.
Starting the application
When you launch Nama POS you first see a splash screen with a progress bar while the register wakes up.

Behind that splash, the register is doing a few things: opening its local database, applying its saved language and theme, loading its configuration and prices from cache, and — if it can reach the server — pulling down any fresh data and pushing up anything left over from last time. If the server cannot be reached, the register simply carries on in offline mode; you can still sell.
Signing in
Once the register is ready, the login screen appears.
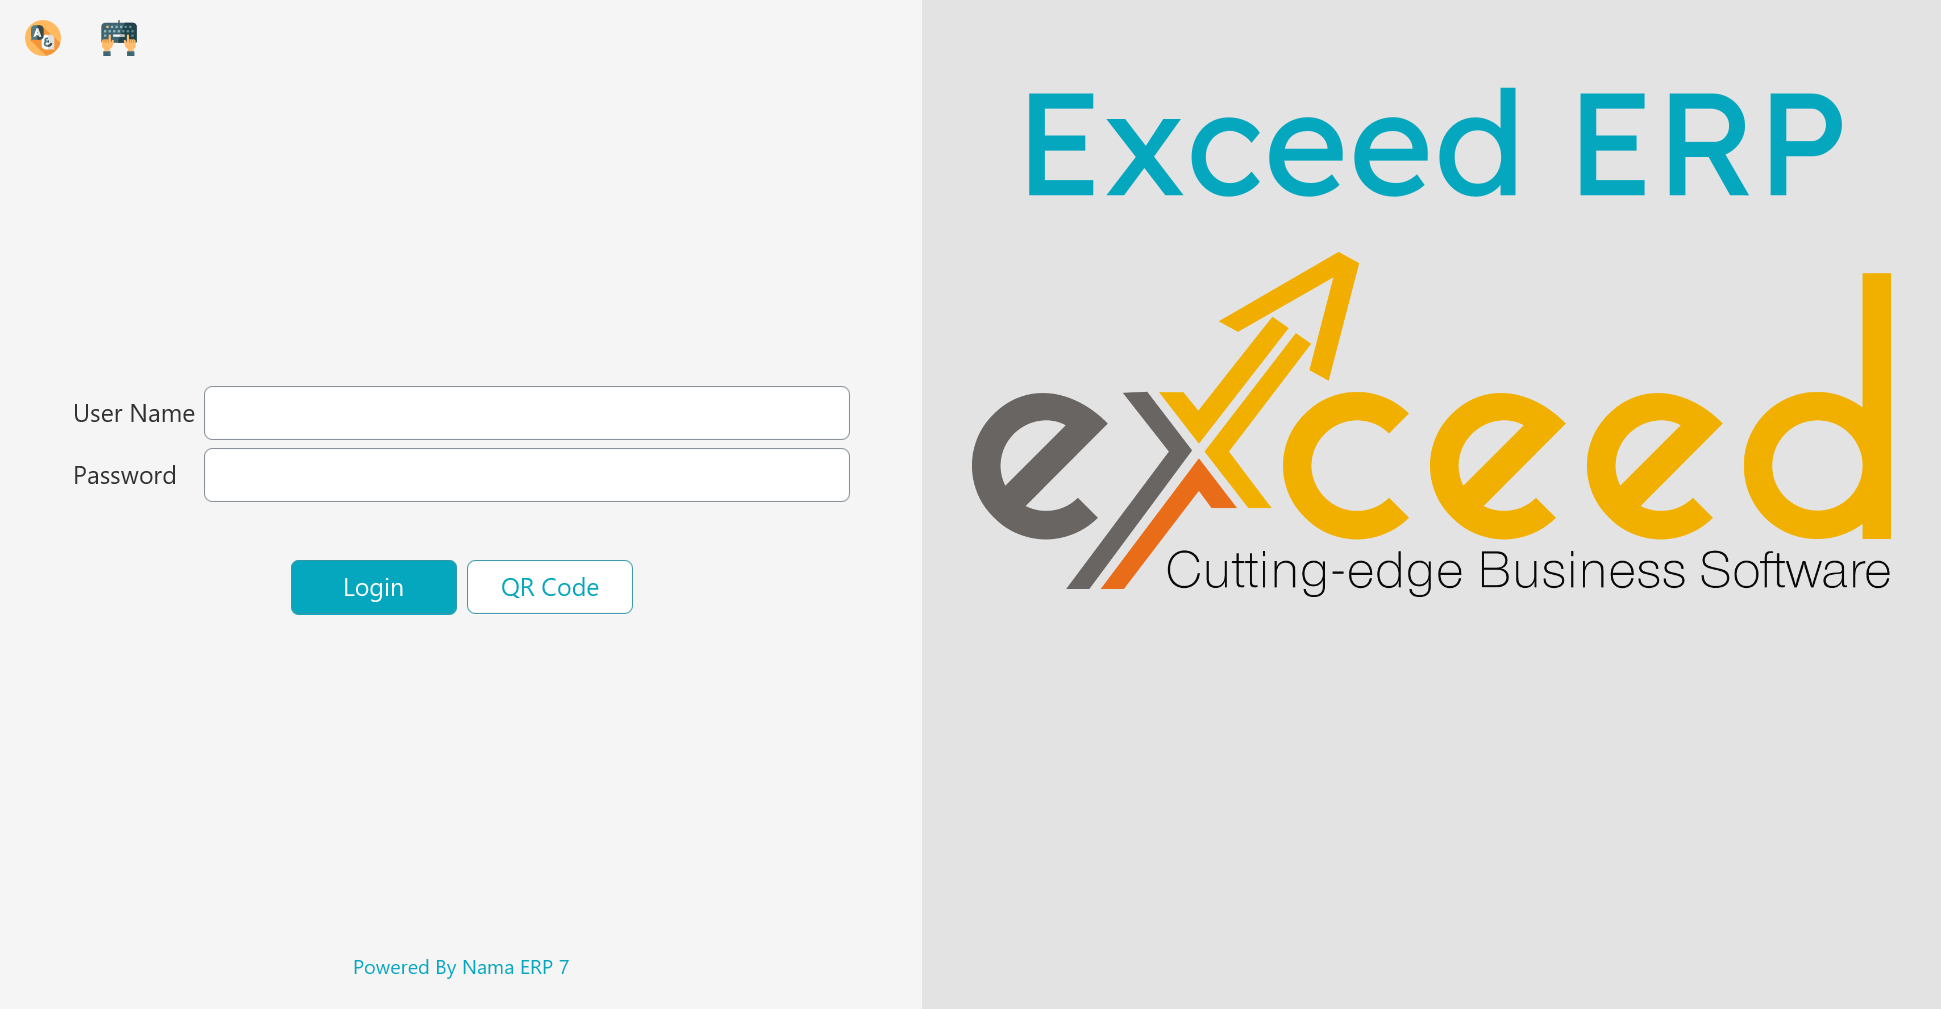
There are three ways to sign in, and they can all be used at the same register:
Username and password. The classic way. Type your user name, then your password, and press Enter. Your security profile loads with you — that is what decides which actions you are allowed to perform (see Lock and security below).
Fingerprint. If your fingerprint has been enrolled, just place your finger on the reader — no typing at all. The reader is listening in the background on the login screen, the unlock screen, and the supervisor-authorization prompt. Enrolment and setup are covered in Fingerprint login.
API key. Instead of storing a password on the machine, a register can sign in with an API key tied to a user. This keeps working even after that user's password changes, and avoids keeping a password (even encrypted) in the register's files. You can paste the key into the initial-settings window in place of the user name and password. The detailed setup lives in the technical points guide.
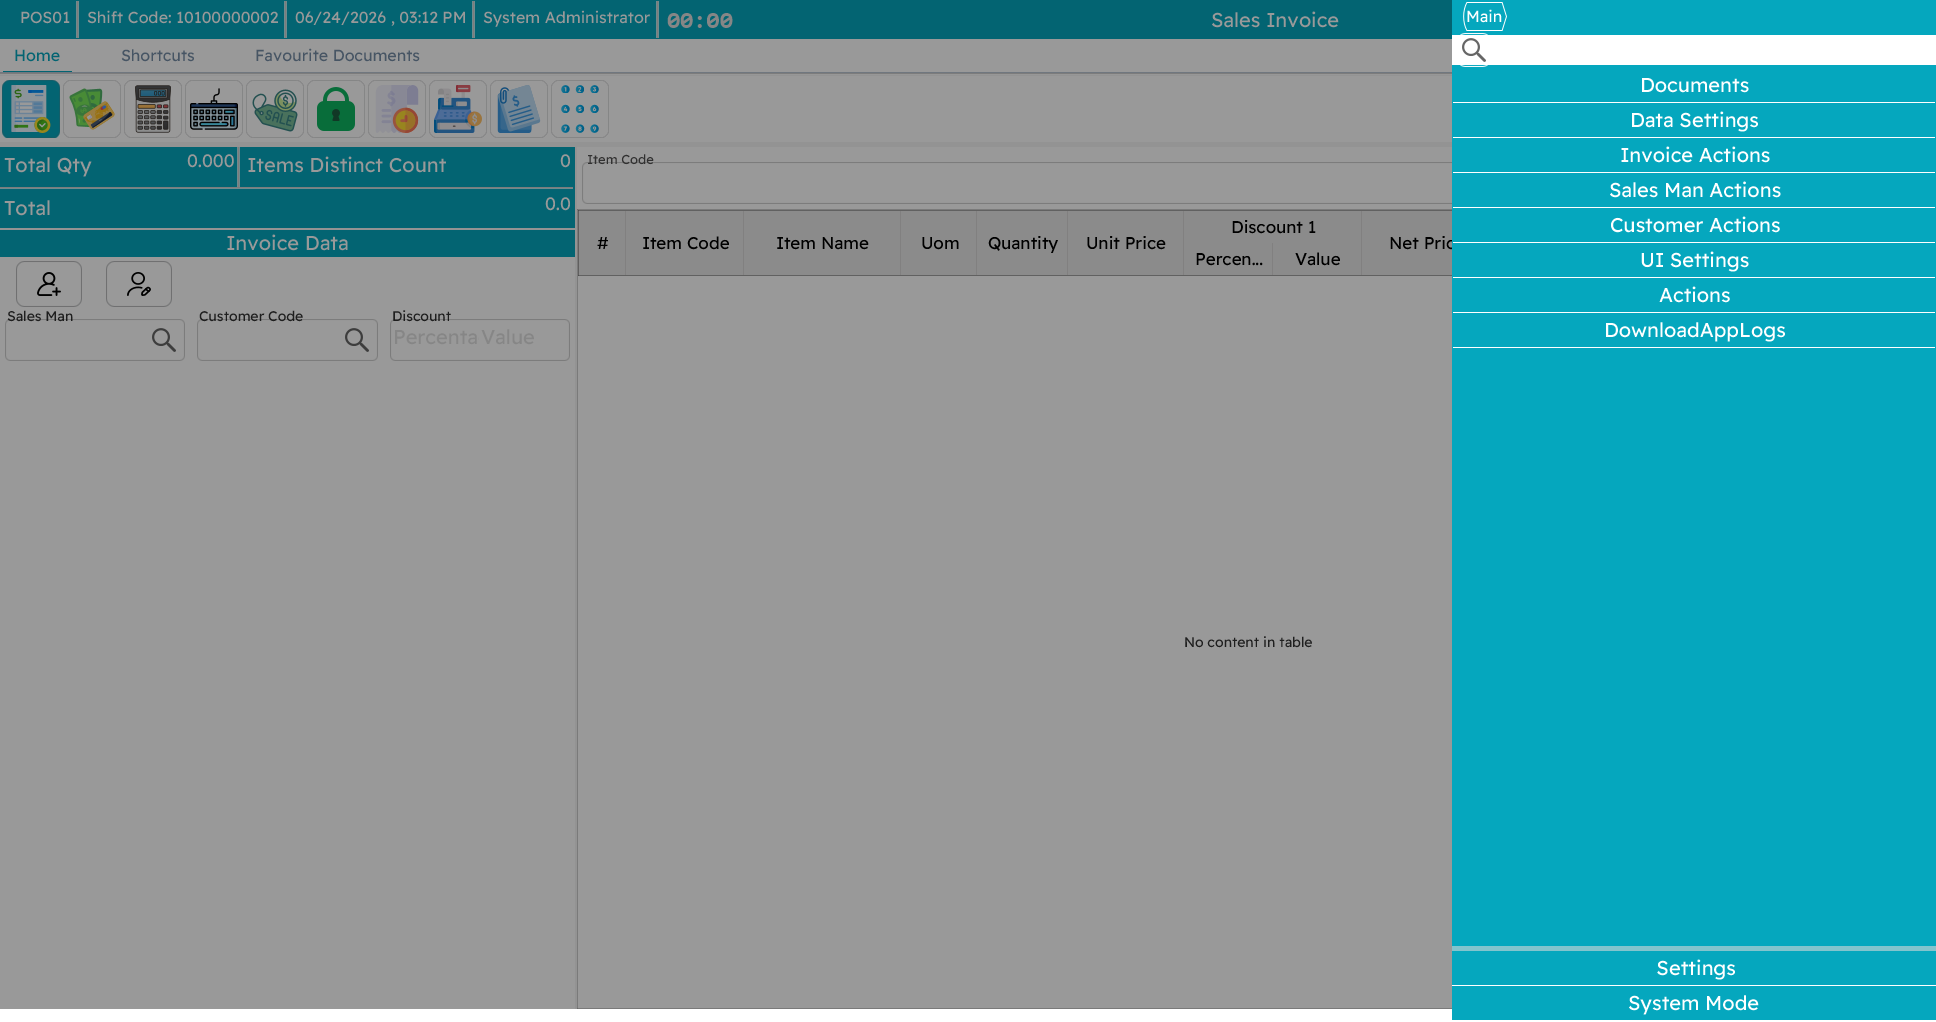
Finding your way around
The slide menu
The main menu slides in from the side of the screen. It holds buttons for the common actions — new sale, payment, returns, shifts, held invoices, reports, lock, and so on. Click an action to go to its screen.
Keyboard shortcuts
A busy counter runs on the keyboard, not the mouse. Nama POS ships with sensible default shortcuts (your administrator can change any of them on the server, so yours may differ):
| Shortcut | Action | Shortcut | Action |
|---|---|---|---|
Alt+F1 | New sale | F6 | Hold (suspend) the invoice |
F1 | Move between the line grid and header | Ctrl+F6 | Show held invoices |
Ctrl+F1 | Sales return | Shift+F6 | Delete all held invoices |
Shift+F1 | Sales replacement (exchange) | Ctrl+Shift+F6 | Show call-center held orders |
F2 | Shift screen (open/close) | F7 | Choose the customer |
Ctrl+F2 | Inventory screen | Shift+F7 | Add a new customer |
F3 | Item / record search | Ctrl+F7 | Remove the customer |
Ctrl+F3 | Open an existing invoice | F8 | Choose the salesman |
F4 | Change font size | Ctrl+F8 | Remove the salesman |
F5 | Payment / tender | Ctrl+F9 | Price inquiry |
F10 | Invoice discount | Alt+1 … Alt+8 | Line discount levels 1–8 |
Ctrl+F10 | Remove the invoice discount | Ctrl+Q | Edit the selected line's quantity |
F11 | Lock the screen | Ctrl+Del | Delete the selected line |
Ctrl+F11 | Show all notifications | + | Duplicate the selected line |
F12 | Help | Alt+P | Reprint |
Alt+R | Pay using reward points | Ctrl+O | Online-order inquiry |
Page Up | Jump to the header fields | Page Down | Jump to the line grid |
Alt+F4 | Close the application | Ctrl+I | Open a held invoice by code |
TIP
You do not need to memorize these. The slide menu shows the shortcut next to each action, and the most-used ones (new sale, payment, hold, discount) become second nature within a day.
Lock and security
Locking the screen
Whenever you step away from the register — even for a moment — lock the screen with F11. The screen is then covered by a prompt, and someone must sign in to use the register again. This keeps sales from being rung up under your name while you are not there, and the lock/unlock is recorded for auditing.
To unlock, sign in again (your own credentials, or another authorized user's, or a fingerprint). Whoever unlocks becomes the active operator.
Supervisor authorization
Some actions are deliberately restricted — a large discount, a return after the allowed period, cancelling an invoice. When a cashier without that permission tries one, Nama POS does not just refuse. Instead it pops up a small authorization window asking for the credentials of someone who does have the permission.
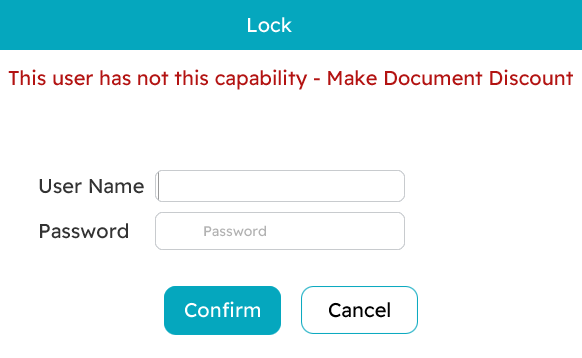
The supervisor types their user name and password (or uses their fingerprint), the action goes through, and the cashier carries on — no logging out and back in. Every such authorization is logged.
Users and security profiles
Two ideas work together here:
- A POS user is a login account, tied to an employee.
- A security profile is a named bundle of permissions — "Cashier", "Supervisor", "Manager" and so on. Each user is assigned one profile, and many users can share the same profile.
A profile is what answers questions like: Can this person give a discount? Process a return? See the expected cash total when closing a shift? Open the cash drawer? These are all set up centrally on the server and pushed down to every register, so changing a profile updates everyone who has it.
Language & theme
Nama POS can run in more than one language. From the settings area you can switch the interface language; the choice is remembered on that register.
You can also switch between a light and a dark theme — dark is easier on the eyes in a dim shop, light is clearer under bright lights.
Individual text labels can also be overridden per register — for example a café might prefer the word "Bill" to "Invoice". These overrides are set up centrally and pushed to the register, so the wording you see may be tailored to your business.