
Creating and Maintaining Items
This page covers the screens that surround the item card — opening items in bulk, changing them after the fact, deciding who is allowed to buy them, and telling the warehouse where they belong. For the item card itself, and what an item is, see Understanding Inventory Items.
There is a reason these live on separate screens rather than on the item itself. An item card is edited by one person, one item at a time. Opening two hundred items for a new season, or raising the minimum stock level on every item in a warehouse, is a different kind of job — and in most organisations it is done by different people, under different approval rules.
Asking for a New Item: the Item Opening Request
In a small company anyone who needs a new item just creates one. In a larger one that quickly turns into chaos: three people create three near-identical items, nobody agrees on the coding convention, and the accounting team discovers the mess a month later.
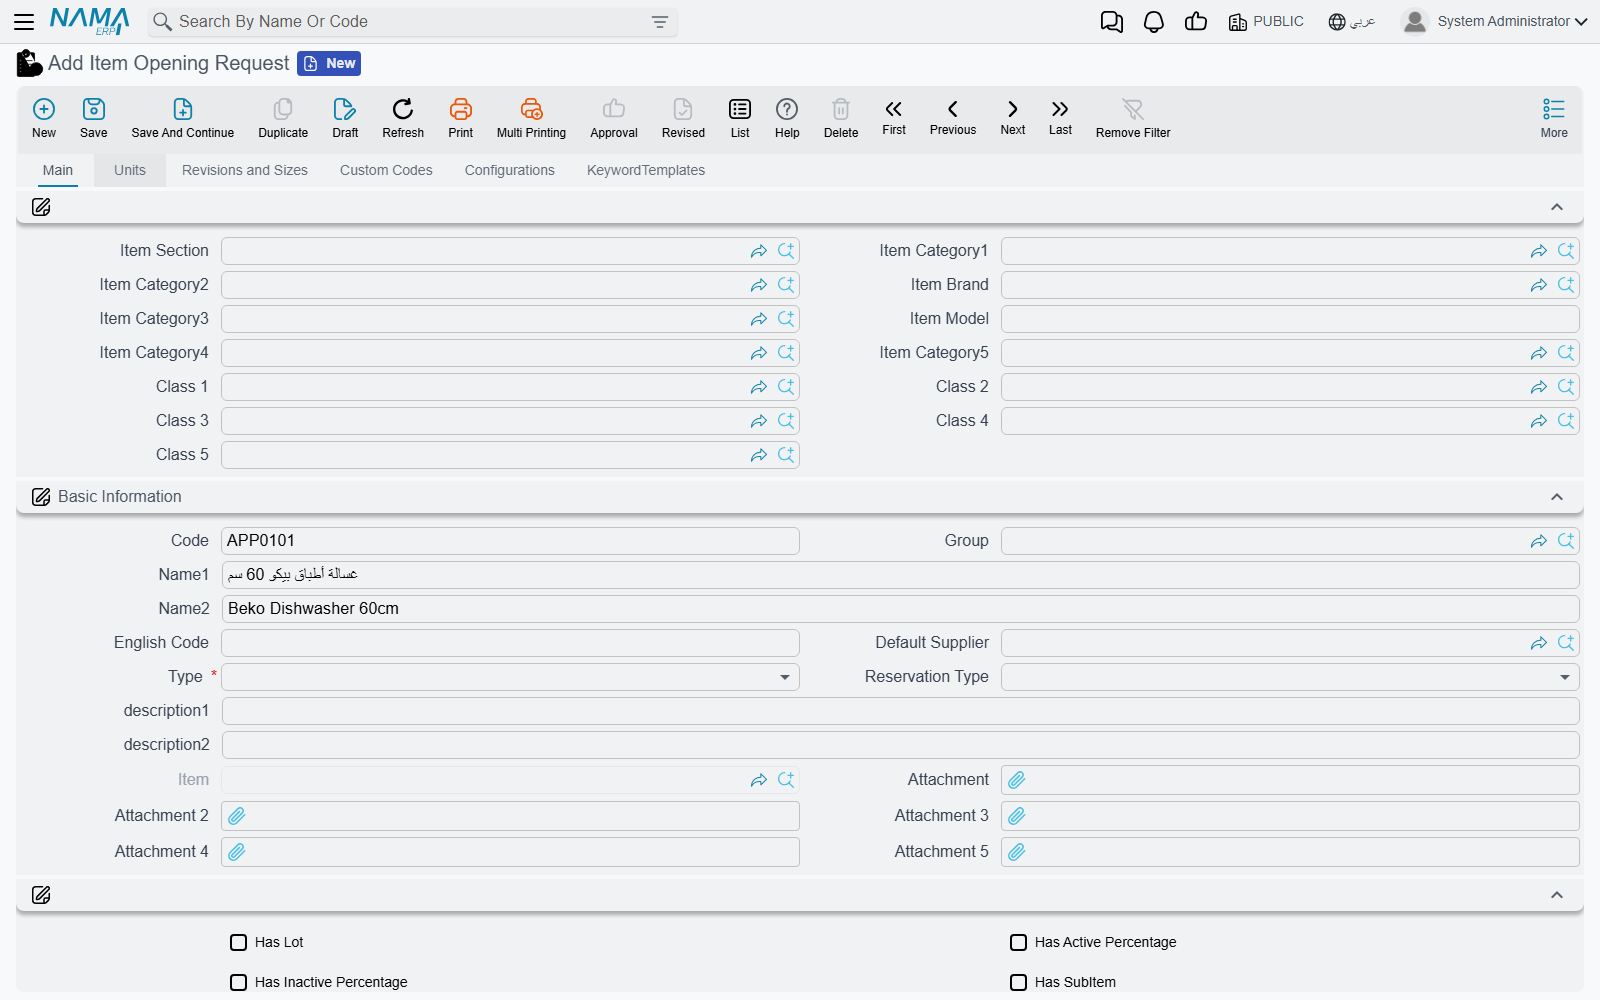
The Item Opening Request screen (Inventory → Master Files → Item Opening Request) is the answer. The person who wants the item — a salesman who has been asked for a product you do not stock, a purchasing officer who found a new supplier — fills in a request describing the item they want. It looks almost exactly like the item card, because it is meant to: the same tabs for units, revisions and sizes, custom codes, configurations and keywords, so the requester can supply as much detail as they know.
Then the item master team reviews the request and creates the real item from it.
The direction may surprise you
There is no "approve" or "create item" button on the request itself. You go the other way round: create the new Item, and on the item card pick the request in the Opining Request field. Choosing it copies the whole request across in one step — the basic data, the revisions, the keywords, the per-warehouse rows, the sizes and colours, the customer and supplier codes, the unit conversions, and both the primary and secondary unit grids.
So the request is a filled-in draft that the item master team pulls from, not a document that pushes an item into existence.
Because the request is an ordinary master file, the usual approval machinery applies to it. If you want requests to be formally approved before anyone acts on them, that is set up the same way as for any other screen rather than through anything specific to items.
Opening Many Items at Once: the Multiple Item Creator
Some items do not arrive one at a time. A clothing importer opening a new season needs the same shirt in four classes of fabric and three of cut. A distributor taking on a supplier's catalogue needs sixty items that differ only in one attribute.
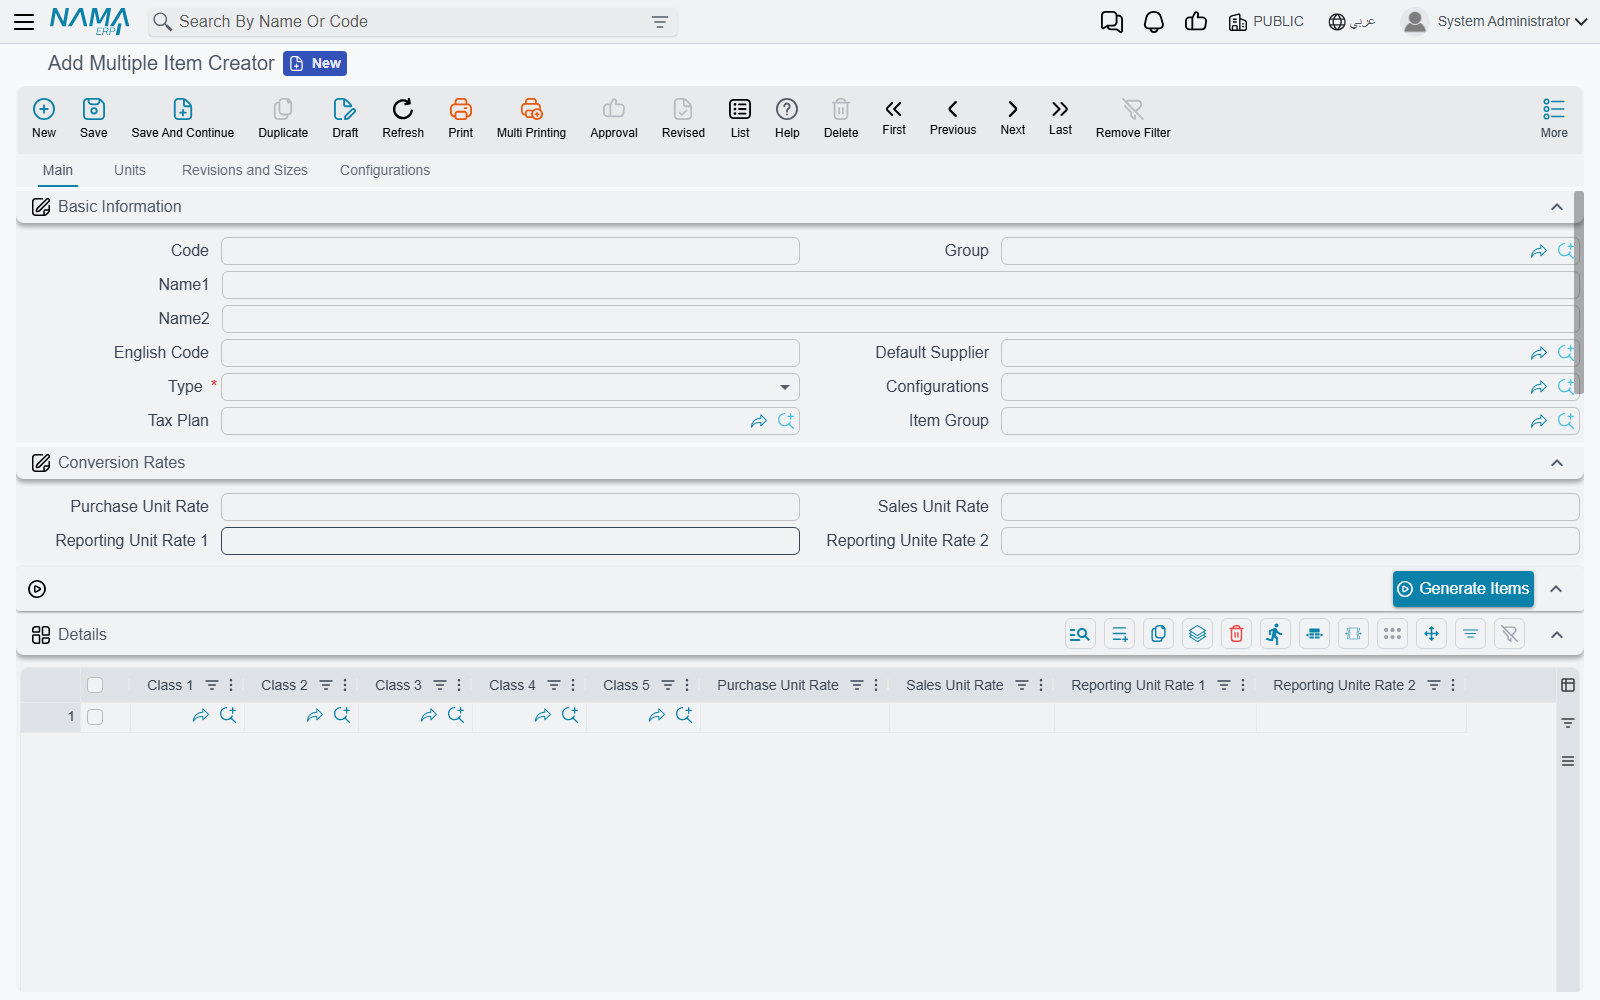
The Multiple Item Creator (Inventory → Master Files → Multiple Item Creator) is built for exactly that shape of work. You fill in one screen that describes the item you want as a template — and it really is the full item definition, spread over the Main, Units, Revisions and Sizes, and Configurations tabs. Everything is there: the tracking switches (Has Lot, Has Serial, Has Expiry, Has Colors, Has Size, Has Revisions, Has Packages, Has Measures), the trading switches (Purchasable, Sellable, Manufacturable, Returnable, Replaceable), Over Draft Policy and Track Stock Ages, the planning figures under MRP Info (Purchase Lead Time, Manufacture Lead Time, Safety Stock, Minimum Order Quantity), the Auto Sales Pricing Info profit bands, and both the primary and secondary unit setups.
Underneath the template sits the Details grid, and this is where the multiplication happens. Each line carries Class 1 through Class 10 plus the four unit conversion rates. When you press Generate Items, you get one item per line — every one of them built from the template, each differing by the classification values on its own line.
Item classes are what the tool multiplies by
The generation grid offers Class 1–10 and nothing else. Item categories sit on the template as ordinary reference fields: each generated item gets the same categories, but they do not multiply. If you are deciding how to structure your item classification, this screen is a good indication of which mechanism the system is built around — see Item Classification Files for the full picture.
Deciding How an Item Is Tracked: Item Configurations
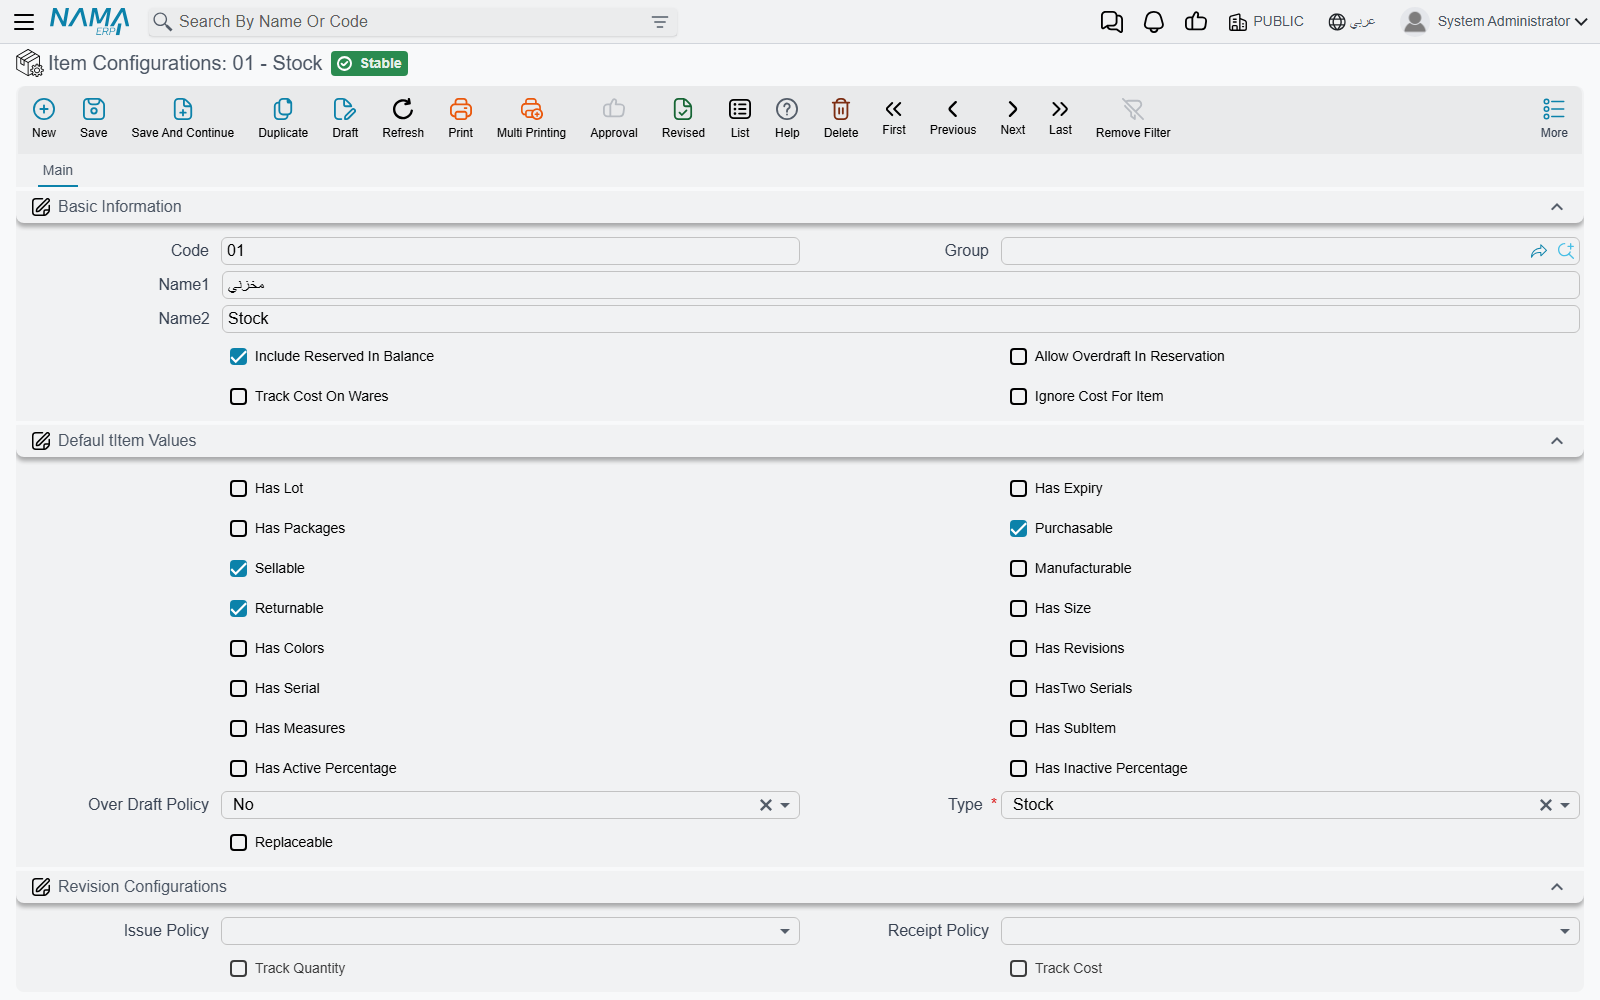
Of all the screens on this page, Item Configurations (Inventory → Settings → Item Configurations) has the widest reach. It is a named, reusable profile that answers a question you would otherwise have to answer separately for every item: which details must be captured when this stock moves, and what is tracked against them?
Ten tracking dimensions each get their own block — Revision, Size, Colour, Lot, Active Percentage, Inactive Percentage, SubItem, Measures, Serial, and Packaging. Each block asks the same six questions, and the first two are the ones that matter day to day:
| Setting | What it decides |
|---|---|
| Issue Policy | Whether the value must be supplied when stock goes out — Required, Optional, or Prevented |
| Receipt Policy | The same question when stock comes in |
| Track Quantity | Whether balances are kept separately per value of this dimension |
| Track Cost | Whether cost is kept separately per value of this dimension |
| Allow Empty Values Before Date | A cut-off date before which a blank value is accepted |
| Allow Admin To Receipt With Empty Value | Lets an administrator receive stock without the value |
The Prevented option is worth noticing, because people tend to assume the choice is only between required and optional. Setting a dimension to Prevented means the system will refuse a value there — useful when an item genuinely has no colours and you want to stop anyone recording one.
Turning on batch tracking for stock you already hold
The last two settings exist for a specific and very common situation: a client who has been trading for years decides to start tracking batches or expiry dates, and discovers the system now demands a batch number for stock that was received long before anyone thought about batches. Allowing Items With Batch & Expiry to Hold Untagged Quantities explains how the cut-off date solves it.
Three more groups sit below the dimension blocks:
Quantity and cost by dimension. Track Qty On Sector, Track Cost On Sector and their equivalents for Branch, Department and Analysis Set decide whether balances and costs are held separately per organisational dimension, rather than only per warehouse.
Dimensions For Delivery. A row of Consider… switches — Revision, Size, Colour, Lot, Active and Inactive Percentage, SubItem, Measures, Box, Warehouse, Locator. These decide which details have to match for delivered stock to count against what was ordered. If Consider Colour is off, delivering the blue one settles a line that ordered the red one; if it is on, it does not.
Auto Sales Pricing Info. Minimum, default and maximum profit percentages for automatic pricing, defined once on the profile rather than per item.
The profile reaches items in two ways. New items take it from the Configurations field on the item card, and for items that already exist there is Copy Item Configuration To Item in the More menu, which pushes the profile's settings onto items that are already in use.
Changing Stocking Policy Later: Item Update
Item Update (Inventory → Master Files → Item Update) exists because minimum and maximum stock levels are not set once and forgotten. They change with the season, with a supplier's lead time, with a warehouse being reorganised.
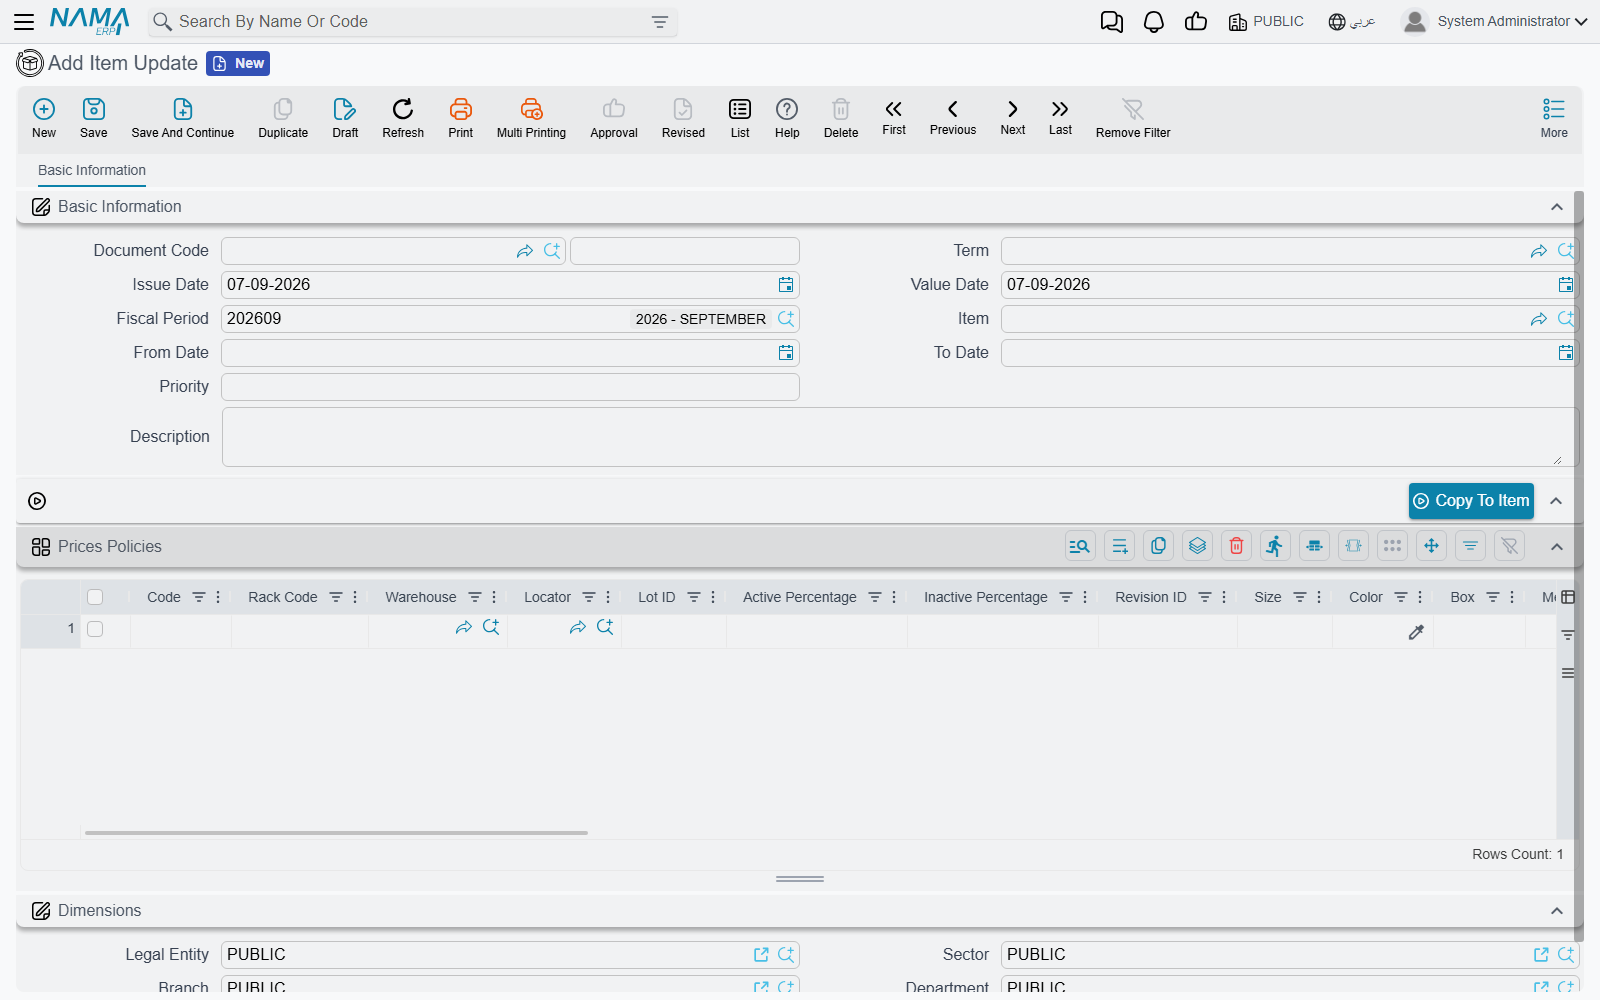
Unlike most screens on this page, this one is a document, not a master file. It has a book and a code, a Term, an Issue Date, a Value Date and a Fiscal Period, which means it behaves like an invoice or a transfer: it is numbered, it can be governed by document terms, and it leaves a record of who changed the stocking policy and when. For an audit that asks "who raised the minimum on this item in March?", that history is the point.
You pick one Item in the header, then fill the Prices Policies grid with the rows you want to apply. Despite the name, most of what the grid holds is stocking policy rather than pricing:
- Min Quantity, Max Quantity and Order Limit — the reorder envelope
- Standard Cost and Min Price
- Slow moving period — how long without movement before the item counts as stagnant
- RE Request, Desirable and Suggested In Discounts And Offers
- Rack Code and the default Locator
Each row is qualified by the combination it applies to, so the policy can differ per Warehouse, Locator, Lot ID, Revision ID, Size, Colour, serial, and the organisational dimensions. One document can therefore set one minimum for the main warehouse and a different one for a branch.
Two header fields are easy to overlook and change how the document behaves. From Date and To Date bound the period the update applies to, and Priority decides which update wins when more than one covers the same item and period. A seasonal uplift can be raised in advance, given a date range and a higher priority, and left to take effect on its own.
The Copy To Item action writes the document's rows onto the item itself.
Controlling Who May Buy or Supply an Item
Not every item is for every customer. A distributor may hold a range that only its licensed dealers can order; a manufacturer may buy a component from exactly one approved supplier.
Two screens record this: Item Customer Link (Inventory → Master Files → Item Customer Link) and Item Supplier Link (Inventory → Master Files → Item Supplier Link). Both are simple — a Details grid of pairs, item on one side, customer or supplier on the other. You can keep one link record per customer, or one per product range covering many customers; the system reads them all together.
The links do nothing until the configuration is switched on
Recording links has no effect by itself. The behaviour is controlled from supply chain configuration, and if the matching option is off the links are simply ignored:
- Link Items To Multiple Customers / Link Items To Multiple Suppliers turn the filtering on.
- The Without Nulls variants decide how an item with no links is treated: leave them off and an unlinked item is available to everyone, turn them on and an unlinked item is available to nobody.
- Check Items Relationship to Customers and Suppliers When Saving turns the filter into a hard rule — a document containing an unlinked item cannot be saved at all, rather than the item merely being hidden from the picker.
These are documented on Items and Master Data Configuration.
The most useful thing to know about these screens is what counts as a match, because it is broader than it first appears. When the system decides whether a customer may be offered an item, it accepts a link to the customer or to that customer's group, customer class, or any of customer classes 1 to 5. Supplier links behave the same way through the supplier class.
That changes how you should set them up. Linking an item to a class of customers is one line; linking it to every customer in that class is a hundred, and they go stale the moment a new customer joins. Prefer the class.
An older, simpler mechanism sits alongside this one
The item card also carries single Limit To Customer and Limit To Supplier reference fields, switched on by Link Items To Customers In Sales And Stock Issue Documents and Link Items To Suppliers In Purchase Documents. These restrict an item to one party rather than many, and an item with the field left empty always passes. They match on group and class in the same way. Use the link screens when an item belongs to several parties, and these fields when it belongs to exactly one.
Relating Items to Each Other: Item Relations
Item Relations (Inventory → Settings → Item Relations) records the fact that one item has something to do with another — the substitute to offer when the first is out of stock, the accessory that goes with it, the newer model that replaced it.
Six kinds of relation ship:
| Relation | Meaning |
|---|---|
| Substitute | An alternative that does the same job |
| Cross Sell | A suggested item to offer alongside |
| Supercede | The item this one has been replaced by |
| Added Service | A service that goes with the item |
| Item Accessories | An accessory belonging to the item |
| FreeItem | An item given away with this one |
Each line in the Items Relations' Details grid names the Item it applies to and the Item 2 it points at, along with the Relations Type and a quantity. What makes the screen scale is that the left-hand side does not have to be a single item: a line can be matched by Class 1–10, by Item Category 1–5, by Item Brand, or by department, so one line can say "every item of this brand comes with this accessory" rather than repeating itself per item.
Lines carry their own From Date and To Date, and the record as a whole has a date range too, plus a Priority that settles which relation applies when more than one matches. A stop other discounts switch prevents other discounts stacking on top of the relation.
Telling the Warehouse Where an Item Belongs: Item Storage Allocation
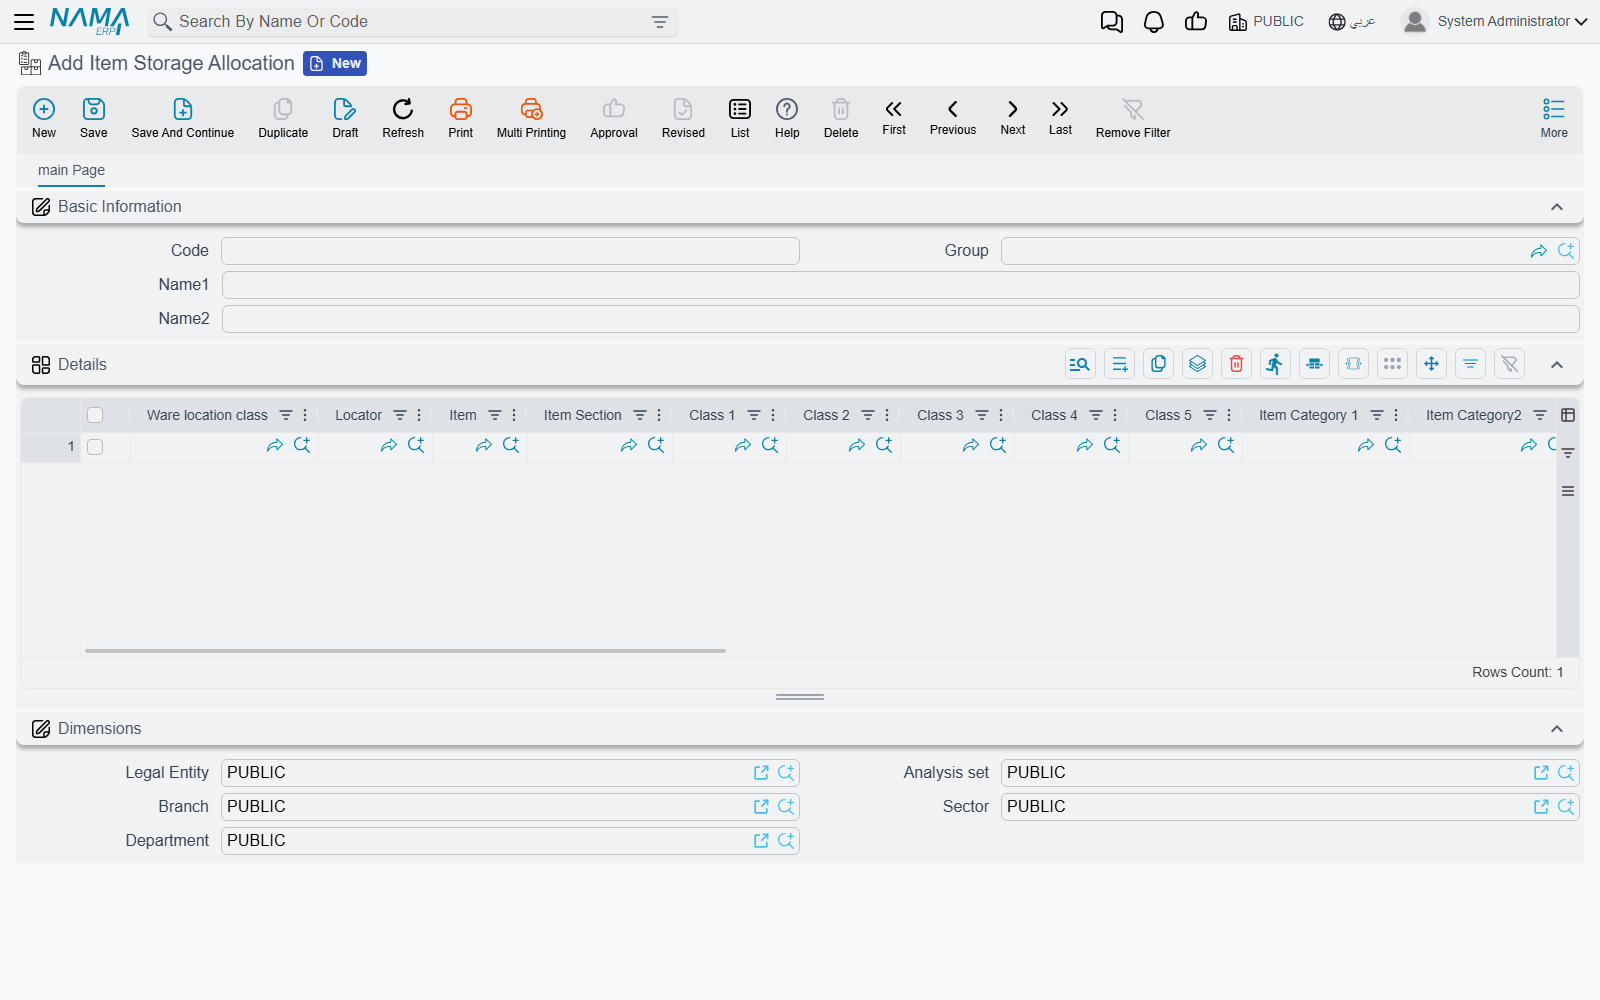
The last screen answers a question nobody asks until a warehouse gets big: when this item arrives, where should it be put?
Item Storage Allocation (Inventory → Master Files → Item Storage Allocation) holds rules that pair a group of items with a place to keep them. Each line in the Details grid picks items by Item, Item Section, Class 1–10 or Item Category 1–5, and points them at a Ware location class and a Locator.
Lines can also be qualified by the physical size of what is being stored — Min length and Max length, minimum and maximum width and height, minimum weight, and a Capacity. That lets one rule send small boxes of a product to picking locations and pallets of the same product to bulk storage, without creating two items.
Location classes themselves, and the locators the rules point at, are covered in Warehouses and Locators.